Neon LMS is a complete package script for setting up online courses and earn by enrolling students. The bundle includes responsive frontend website managed by full-fledge dashboard for Admin, Teachers and Students. Admin can manage every aspect of the system while Teacher can create multiple courses with Lessons and Tests. User can browse through this list and can enroll as student by paying for the course and educate themselves anytime and from anywhere.
So what you're waiting for? Setup Neon LMS and start earning by sharing knowledge.
What's Updated?
- New Feature Added - Community Forums
- How it helps students and instructors?:
- Students react to content, share challenges, teach each other, learn by stating and understanding, clarify assumptions, experiment, and own new skills, and ideas.
- Instructors can invite students to participate in an online discussion, make better engagement, provide assistance, and support students with their doubts.
- Administrator Access:
- Admin can create/delete/manage categories, Tread, Post and Replies
- View private categories
- Bug Fixes
How to upgrade?
- Download latest update zip on Envato and extract it (update_v5.4.5.zip required PHP 8.1 version. If not on a server then don't update the script.)
- Replace .env.example and update .env File. Look into .env.example File
- Replace app/Http/Controllers/Backend/UpdateController.php
- Now, login to your dashboard as an Admin.
- Upload Zip (update_v5.4.5.vs zip)
- You will see list of files which will be updated.
- Click on Update button. It will take a while to update.
Refer README file inside zip

Zoom Meeting

4 Layouts

Dynamic top Menu
Custom Logo

Dynamic Slider

Section On / Off

Custom Counters

Manage Sections

Custom Footer

Get in Touch

ECommerce

Payment Gateways

Languages

Invoice Generator

Newsletter

Messaging Service

Dashboard

Orders

Pages Manager

Blog

Contact Request

Role Management

Settings

Social Login

Site Debugger
Translation

Theme Color

Course Manager

Menu Manager

RTL Support

Multiple Currencies

Certification

Bundles

Free Course

Sitemap

Coupon System

Tax System
1. Local Computer
- Install MySql 5.8 and Php8.1
- Unzip
Neon LMS.zip. - Create a database using one of the sql files and extract
neon-lms-app.zipto a desired location - Go to location, edit .env to update database and other configurations.
- Run
php artisan serve - And you are ready to go!
- Go to localhost:8000 to visit your LMS
2. VPS and Virtual Machine
- Install Nginx, MySql 5.8 and Php8.1
- Unzip
Neon LMS.zip. - Create a database using one of the sql files and extract
neon-lms-app.zipto a desired location - Configure Nginx to point your domain to
location/publicdirectory, Read More. - Go to location, edit .env to update database and other configurations.
- And you are ready to go!
3. Shared Hosting
- MySql 5.8 and Php8.1
- Unzip
Neon LMS.zip. - Create a database using one of the sql files and extract
neon-lms-app.zipto a desired location - Go to location, edit .env to update database and other configurations.
- In cPanel -> Domains change the root directory of your domain to
location/publicdirectory. - Go to location, edit .env to update database and other configurations.
- And you are ready to go!
- Watch Video
Note :
- Default credentials for Login:
For Admin => Email :admin@lms.comPassword:secret
For Teacher => Email :teacher@lms.comPassword:secret
For Student => Email :student@lms.comPassword:secret - There are various scheduled commands in this script. You have to add following job in your CRON:
* * * * * cd /path-to-your-project && php artisan schedule:run >> /dev/null 2>&1 -
If you see images not showing, login as admin and click troubleshoot in
Generalsettings - In some shared hosting: symlinks, exec etc might be disabled, enable APP_DEBUG in .env and check for appropriate error.
This is compulsory to setup for email communication. Otherwise it will create errors.
To set this up go to
Dashboard click on Settings and select
General.
Now click on Mail Configuration tab. It will
look like this:
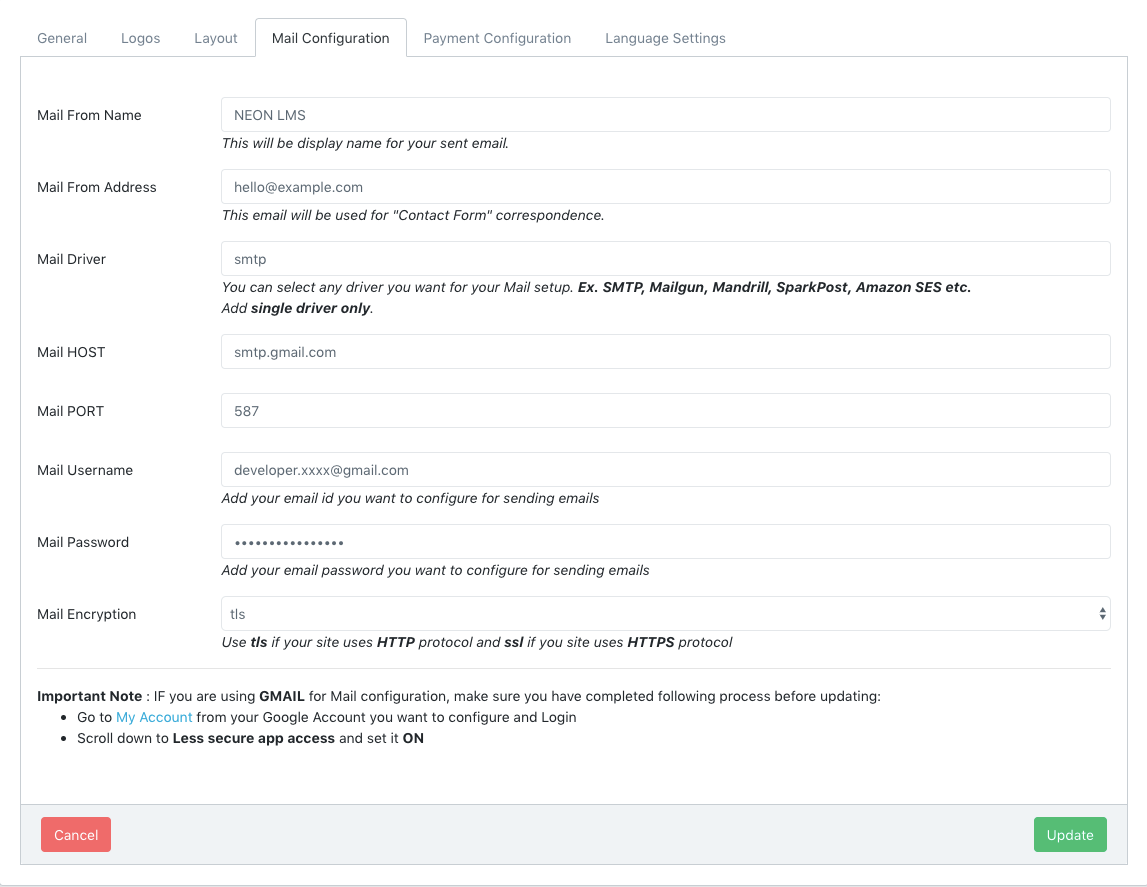
Set up Mail configuration according to your email host and
read all the instructions written below input boxes
This is compulsory to setup for payments functionality. Otherwise user will not be
able to make payments to your products
Dashboard click on Settings and select
General.
Now click on Payment Configuration tab. It
will look like this:

Set up Payment configuration according to your required
payment methods and select currency you want to deal with in purchases. Only checked payments methods will be shown on Checkout page. It
means you can turn on/off all these payment methods.
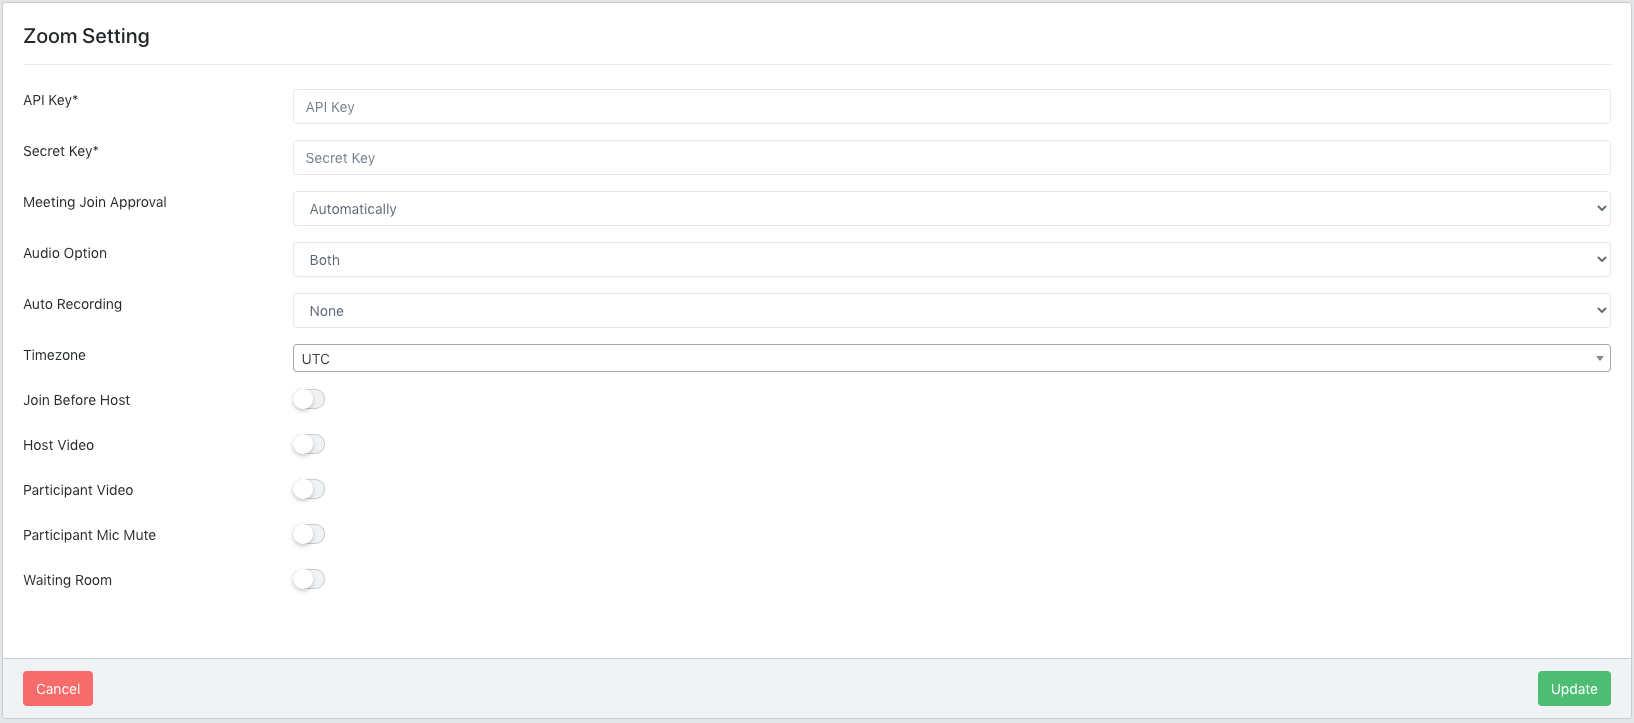
This is compulsory to setup for zoom meeting functionality. Otherwise user will not be
able to make live lesson to your products
Dashboard click on Settings and select
Zoom Setting. It
will look like this:
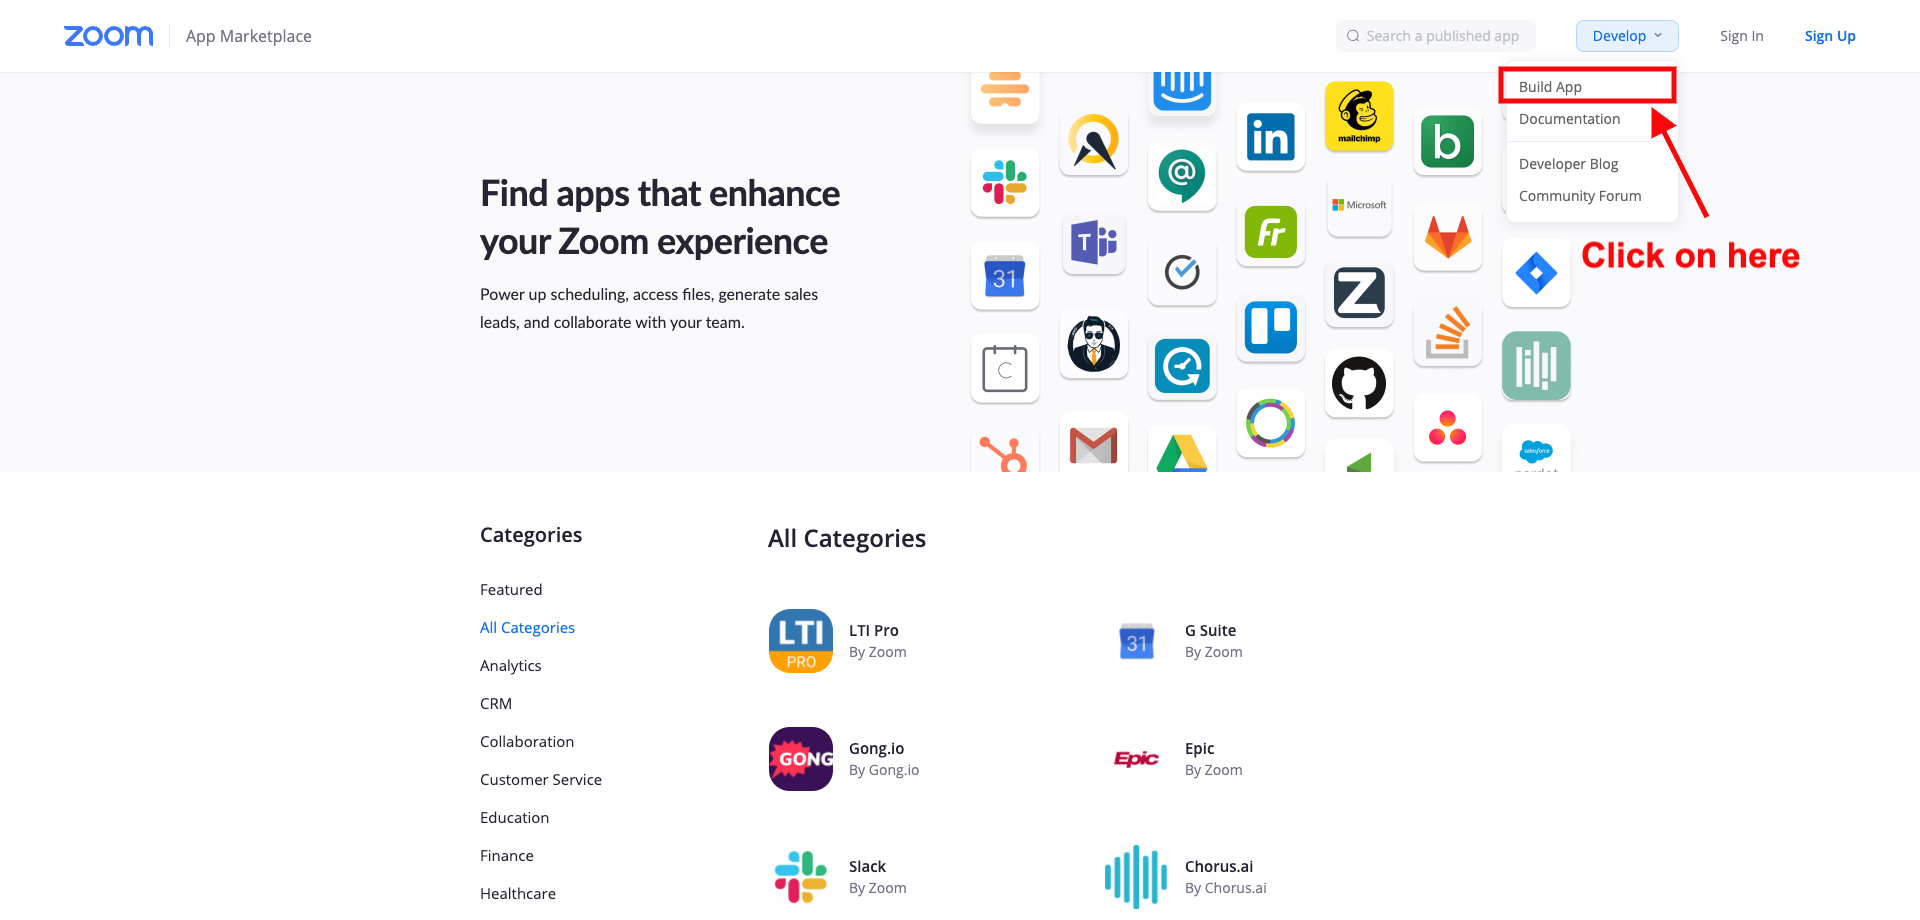
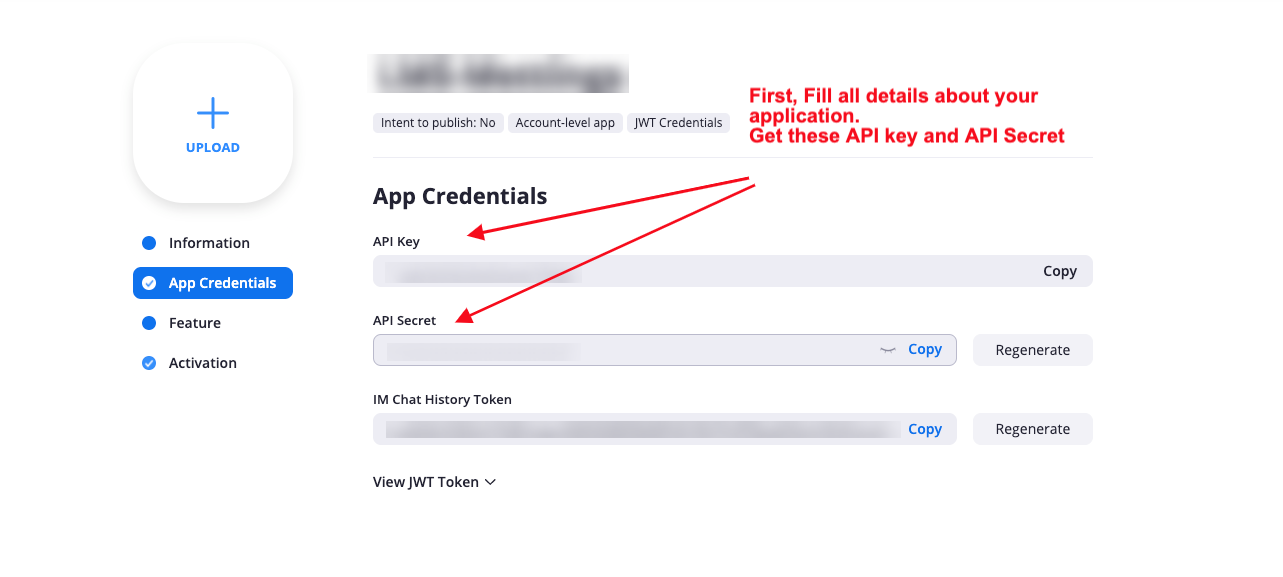
How to Get Zoom Credentials?
1. Go to Zoom Market Place. If you have not zoom account than create new one.
2. Click on Build App.
3. Create JWT app type.
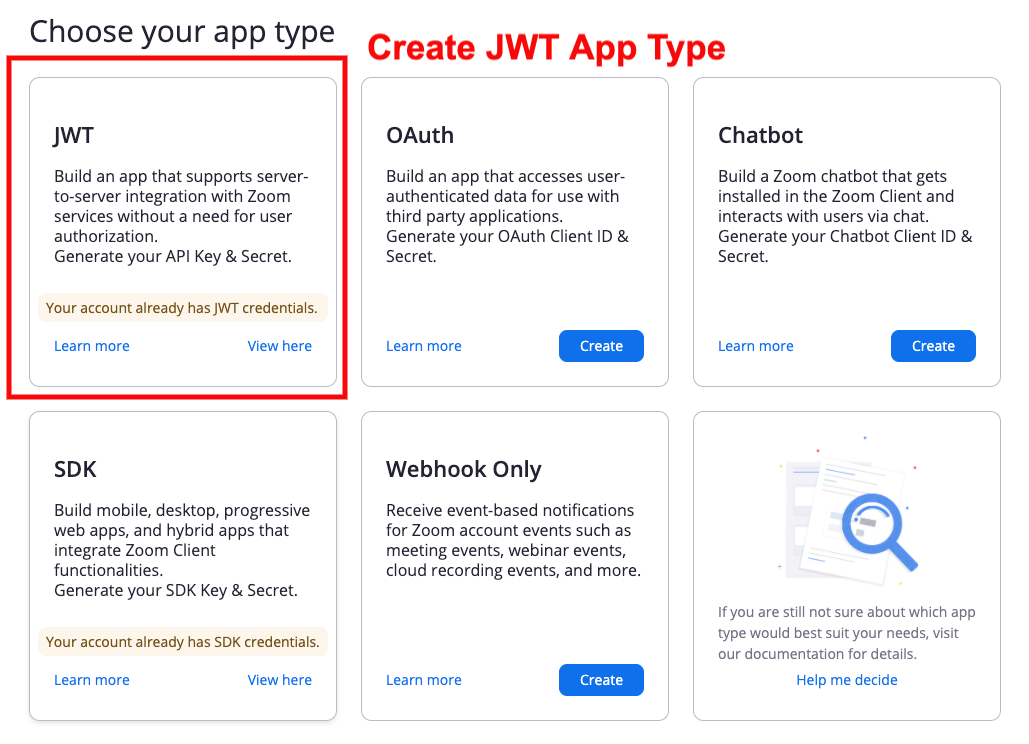
4. Get API key and API secret.
This is compulsory to setup for subscription functionality. Otherwise user will not be able to subscribe plan.
Step 1 (Stripe Credentials)
First of need stripe credentials on this functionality. Go to Admin Dashboard click on Settings and select General Now click on Payment Configuration Tab. it will look like this
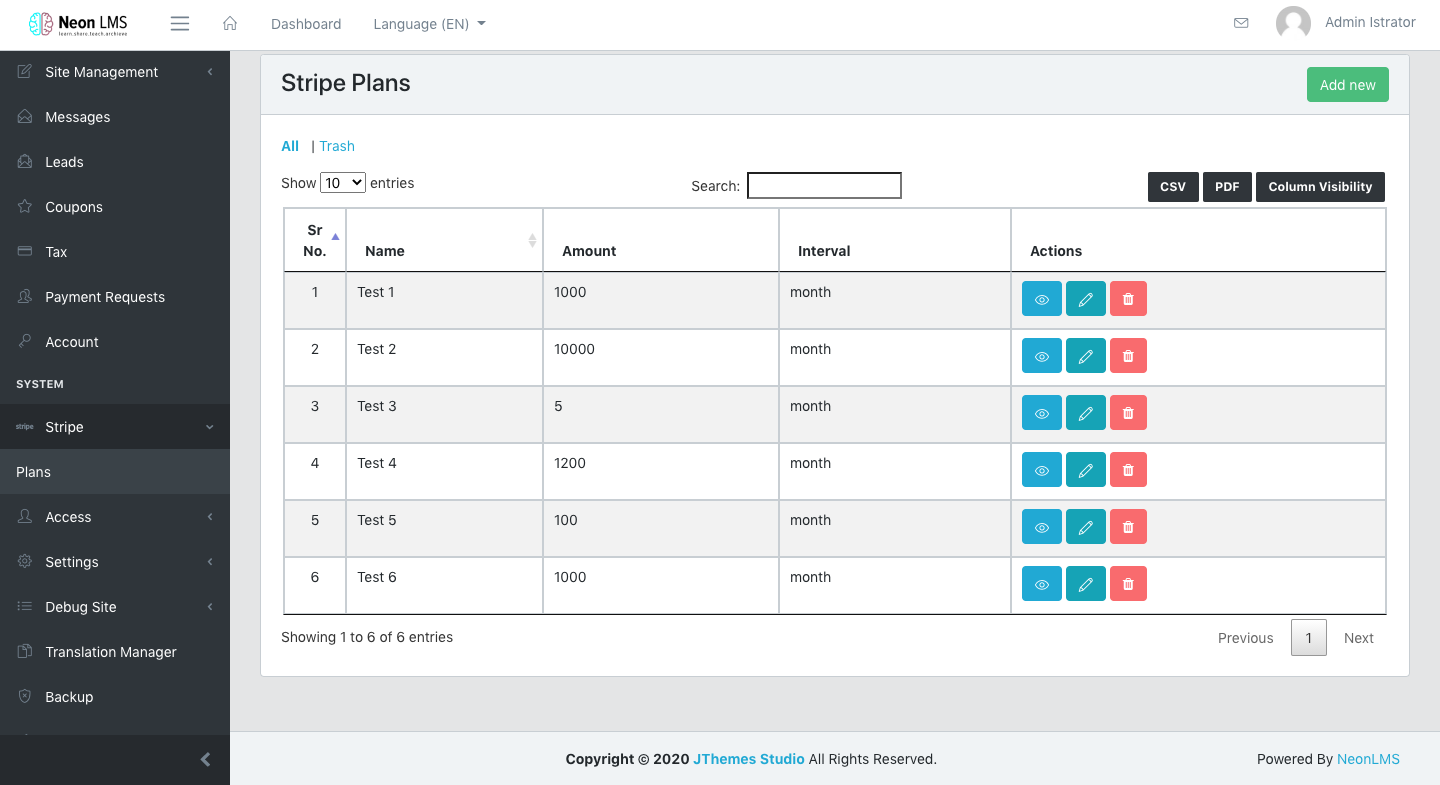
Step 2 (Stripe Plan)
This is independent CRUD and it will be provided to Administrator with full access.
Go to Admin Dashboard click on Stripe and select Plans . it will look like this
You can select the Courses/Bundles that you want the users to have access to under this plan
If you don't select particular courses/bundles, then it will allow the user to all the courses/bundles to have access to.
On the front end, user will be able to subscribe to the plan and will be able to purchase that
Step 3 (Add Menu in Menu Manager)
Go to menu Site Management select Menu Manager and choose nav-menu.
Add new custom link menu with URL subscription/plans and Label Plans(as you wish).
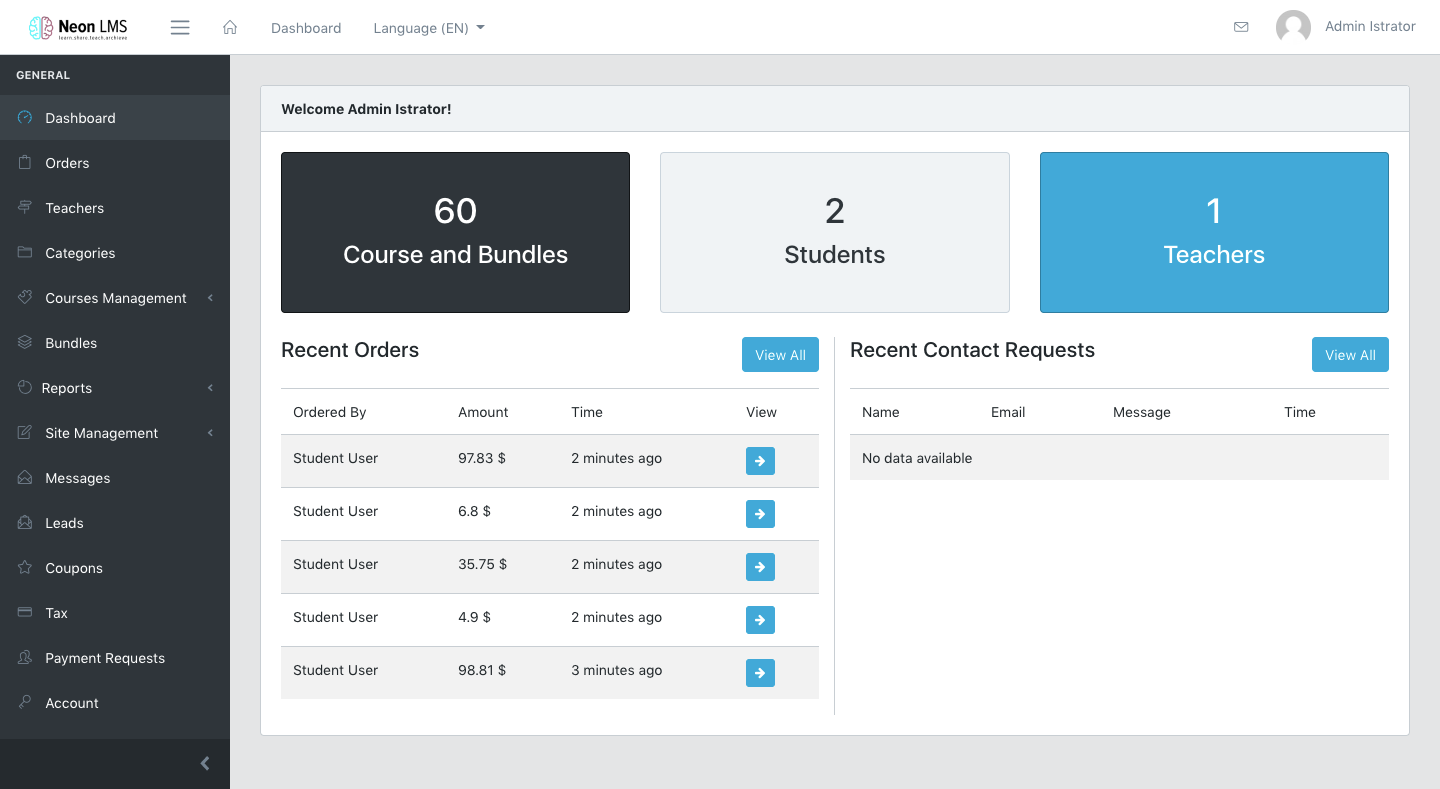
There are different dashboard for each role. Following features are added to their dashboard according to their role.
Administrator Dashboard
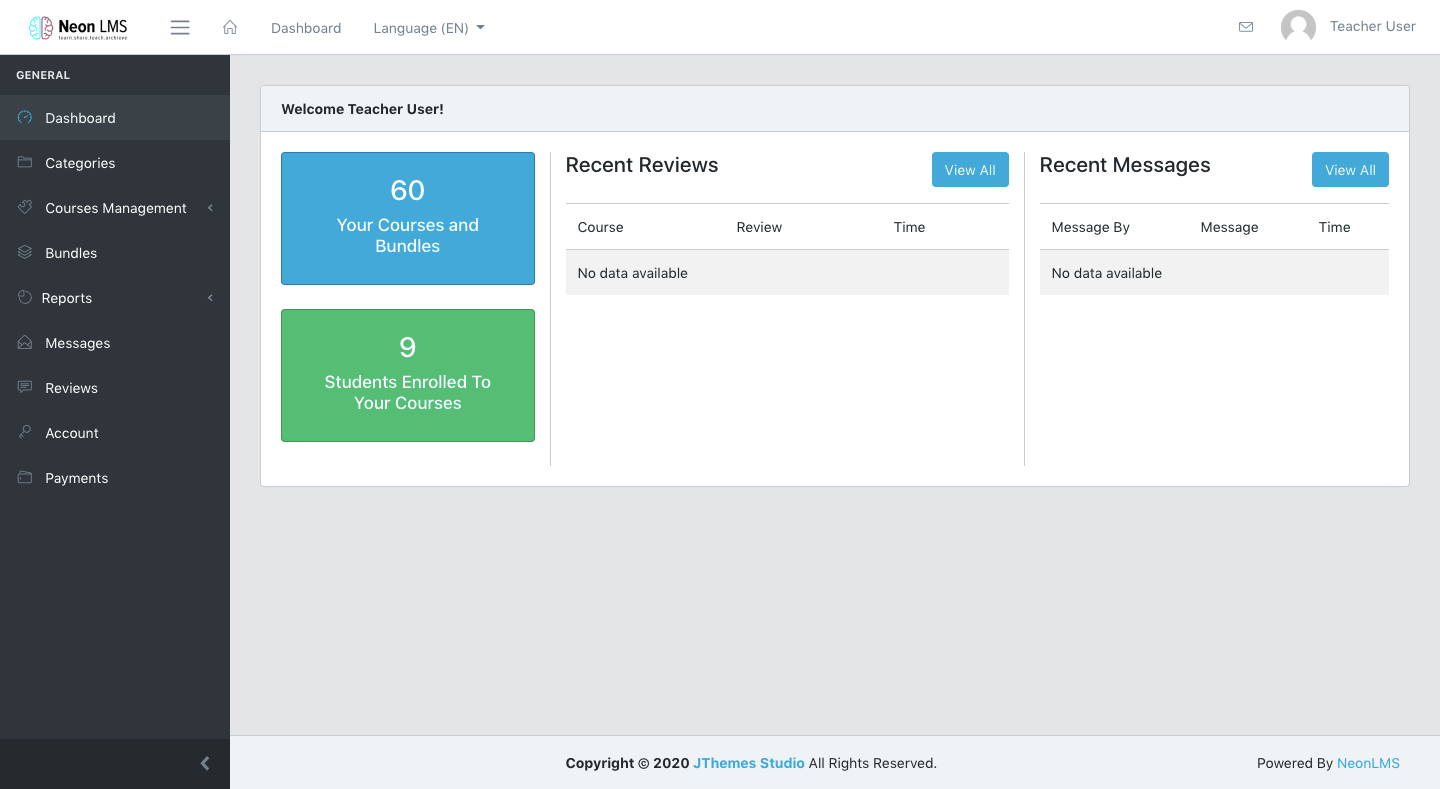
Teacher Dashboard
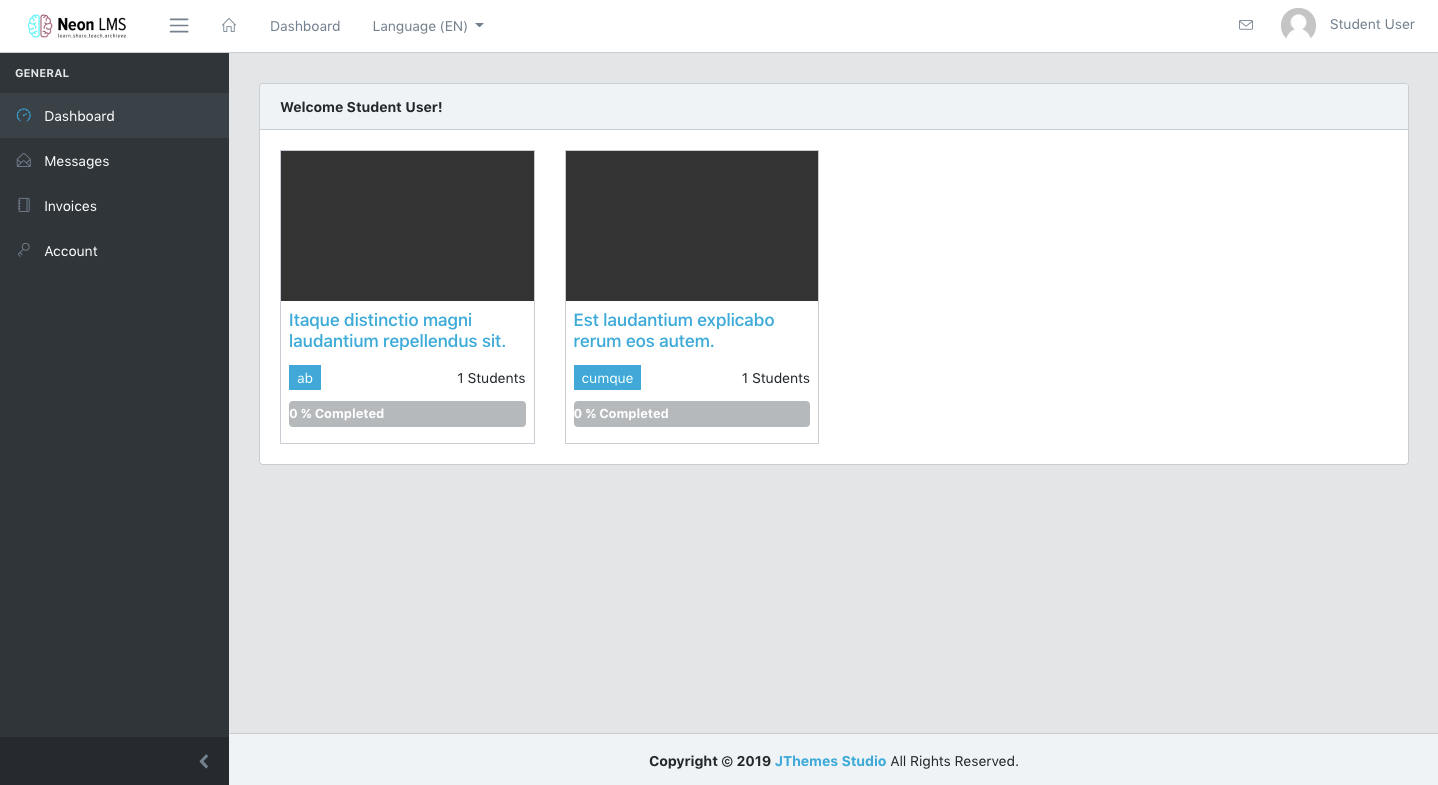
Student Dashboard
Administrator can view, delete and manage all the orders in this tab. This menu will only be available to Administrator.
Besides managing order, Administrator can also Complete Orders Manually.
Manual completion of order occurs when user choses Offline Payment Method.
Administrator will see
button and once he clicks this;
it will complete order and user will be
able to see course in his dashboard
This is complete CRUD for teachers's role. Adding teachers is compulsory if you want to add their course. Basic required details for Teacher will be First Name, Last Name, Email, Image and password.
So teacher can also login with this credentials and create and manage courses
This is independent CRUD and it will be provided to Administrator with full access
and to teacher with restricted access.
Categories will be used to add in Course
as well as in Blog. Basic requirement to add a Category will be only name and
you can select icon for the category as it will be displayed in various places of
theme with icon.
This menu will be provided to Administrator with full access and to Teacher with restricted access. It consists of four submenus
- Courses
- Lessons
- Tests
- Questions
- Live Lesson
- Live Lesson Slots
1. Courses
The combinations of lessons and tests is a course. Basic flow would be like:
- Create Course
- Create Lesson for Course
- Add Tests (If required)
- Add Questions for test (If test created)
You can also add Meta Title, Meta Description, Meta
Keywords for better SEO Results.
Free Bundle feature is also available.
You can also add introductory video of Course. You can choose from various options like embed Youtube, Vimeo, Iframe or upload your own.
Once you create the course you can click
and view the course. Here you can manage Course Timeline.
It will list
all the lessons and tests related to course, you can drag and move them to arrange
in a custom order and click on Save Timeline.
So when user sees this
course it will show all course related lesson and tests in that particular sequence.
Course Timeline will look like this :
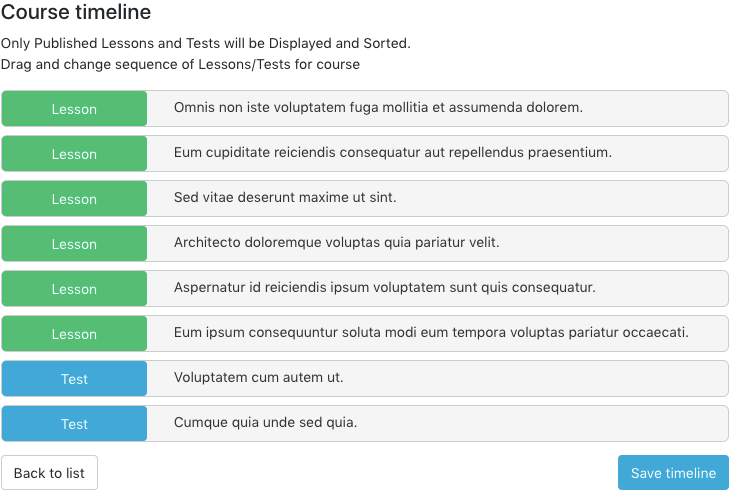
As you can see above, you can easily sort course components according to your requirements.
2. Lessons
You can add lessons to courses and publish lessons for user. Only published lesson will be visible in Course. In Lesson you can add Featured Image, Downloadable Files, Videos etc.
You can also show PDF to users. Just upload to Add PDF and it will be displayed on the lesson screen.
You can add Audio to the lesson it will stream in the user side. Just upload to Add Audio and it will be displayed on the lesson screen.
How to add videos in lesson?
Youtube : Go to Youtube -> Go to video you want to display -> click on share button below video. Copy that links and paste in text input
Vimeo : Go to Vimeo -> Go to video you want to display -> click on share button and copy paste video url text input
Upload : Upload mp4 file in file input
Embed : Copy / Paste embed code in text input
3. Tests
This may contain course to associated with, title and description to be created. And it also has Published checkbox, so if user checks it then only it will be displayed for students. Otherwise it will be stored as a draft. So Now we need to associate Questions with the test.
4. Questions
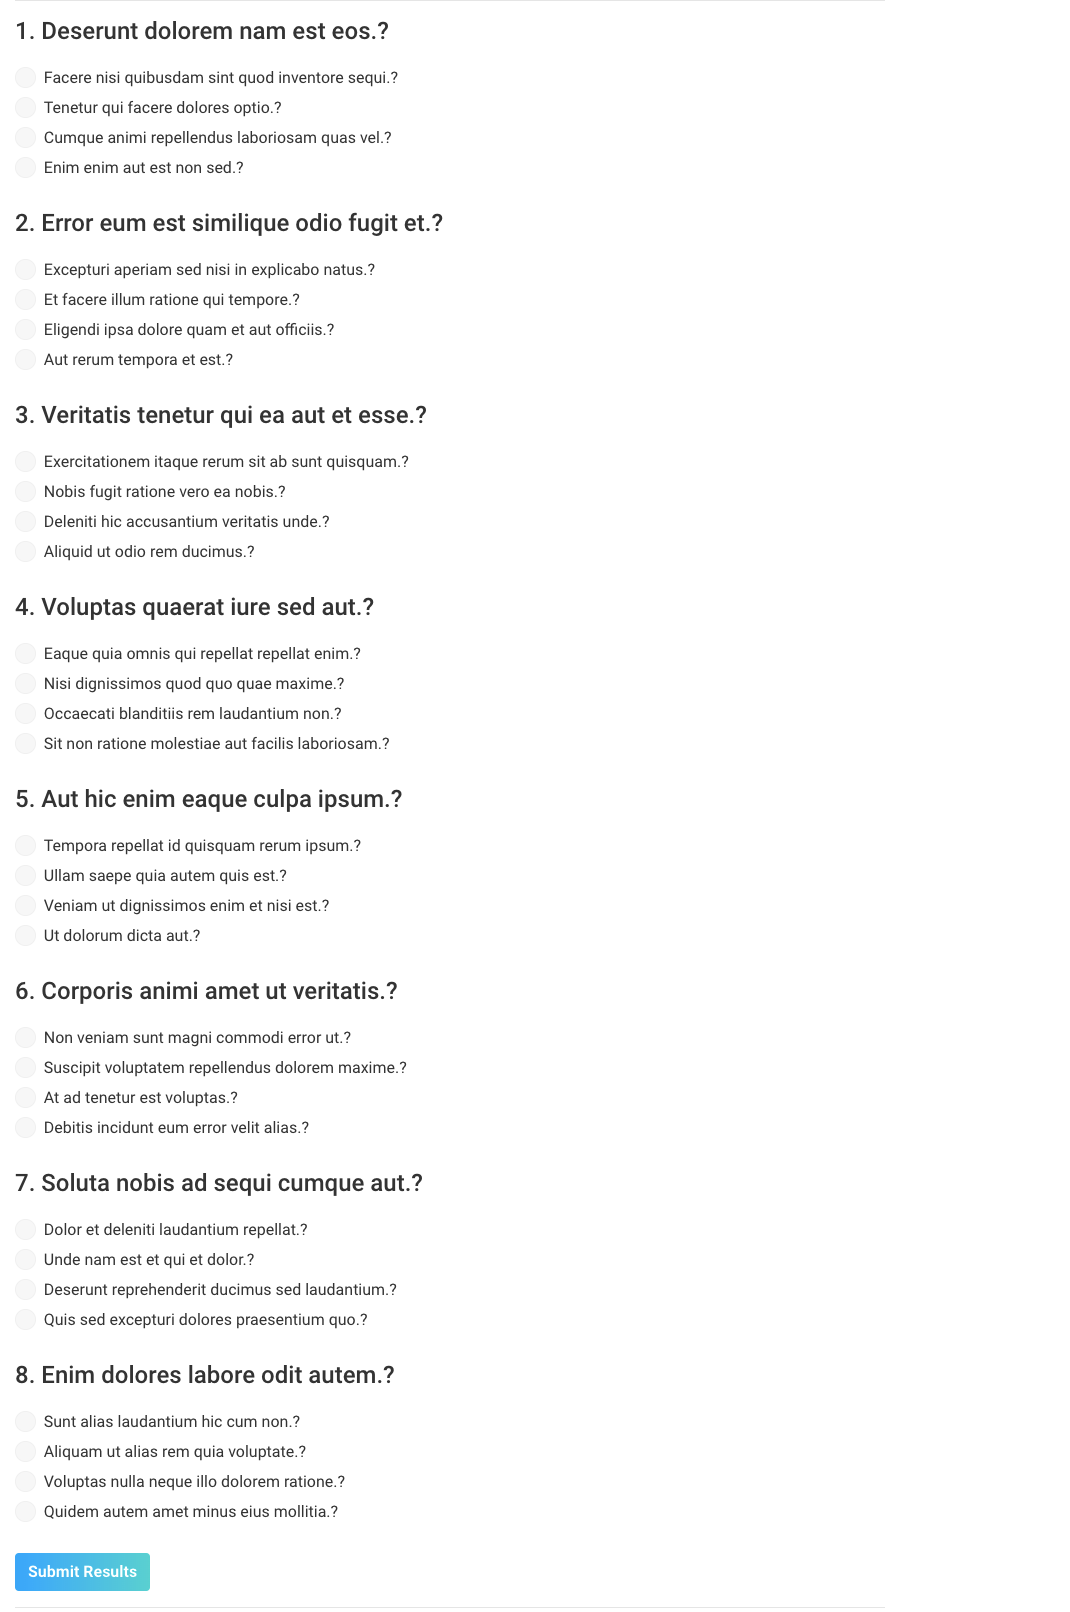
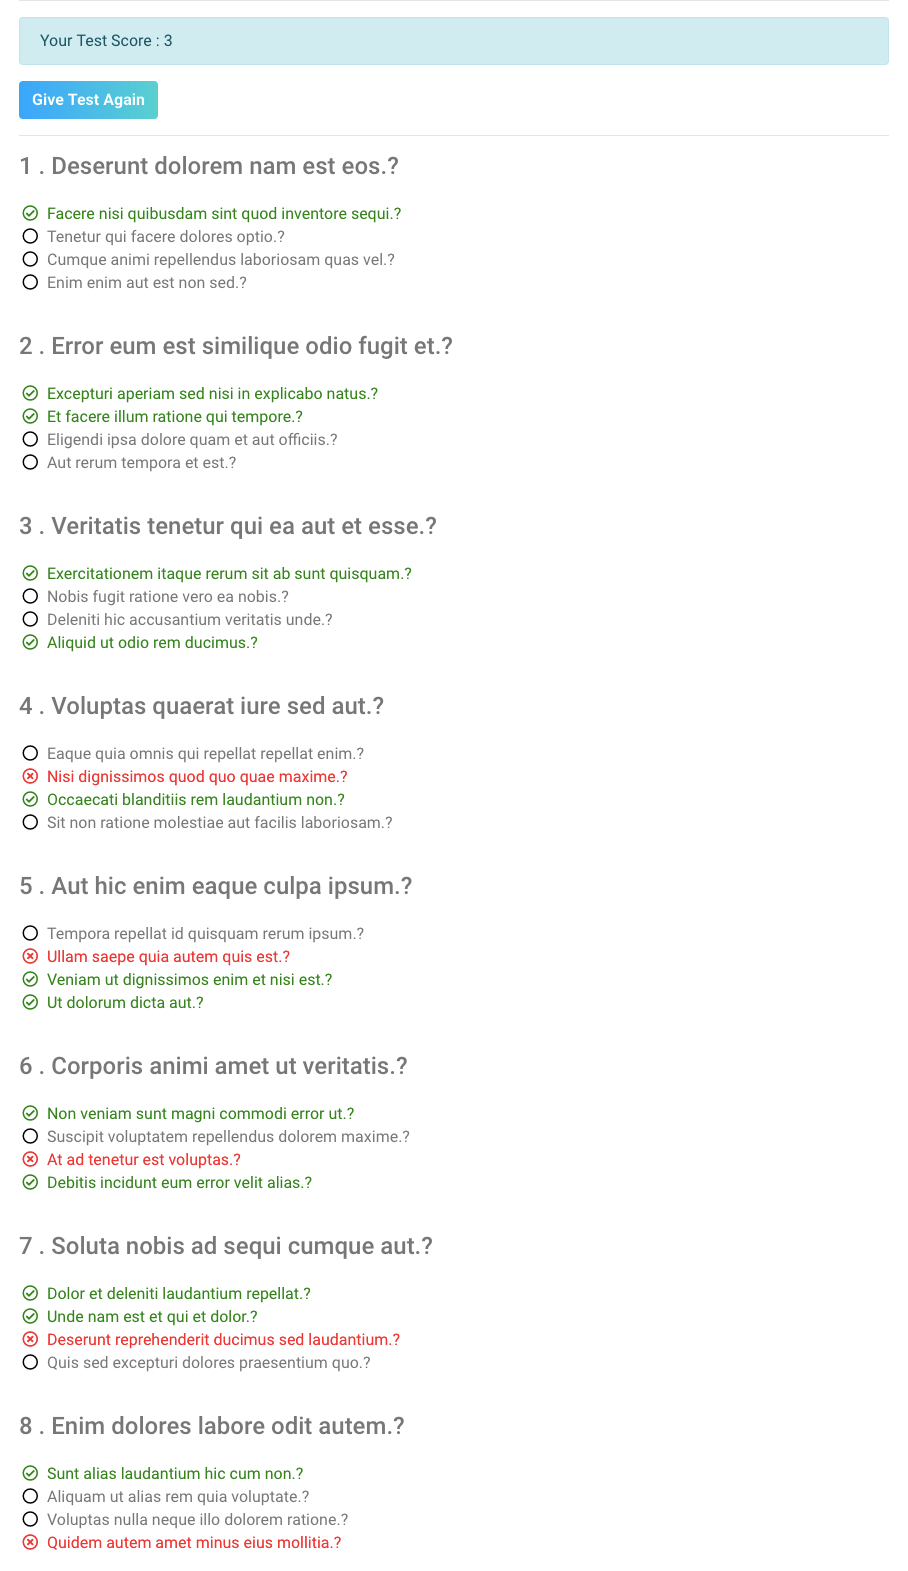
You can associate created question with multiple tests. Basically you will need to write question and four options. And need to check the checkbox; for which one is correct. You can also define score for each question differently. Best part is, when user gives test; he gets instant result. And if he is not satisfied with his result then he can give it again.
Test associated with Questions will look like this :
Result sample will look like this :
5. Live Lesson
You can add course with live lessons for user
6. Live Lesson Slots
you can add every live lesson with multiple slots.
- Each slot integrate with zoom, so carefully create any slot.
- Slot has max 20 student allow.
Note: Once create any slot, never update this slot value.

This functionality will be used to create and manage bundles of the courses. Suppose you want to provide combo of particular category or subject based courses to users in discounted price, then this is the best choice for you.
It looks simliar to Course creating and you can add multiple course in bundles, you can also set custom price for the course, set the featured image and also add description about the bundle
Once you publish the bundle user will be able to purchase the courses available in bundle.
Free Bundle feature is also available
There are basically two reports available.
Sales Report : Where you can get total sales counting and earning for Courses and Bundles both.
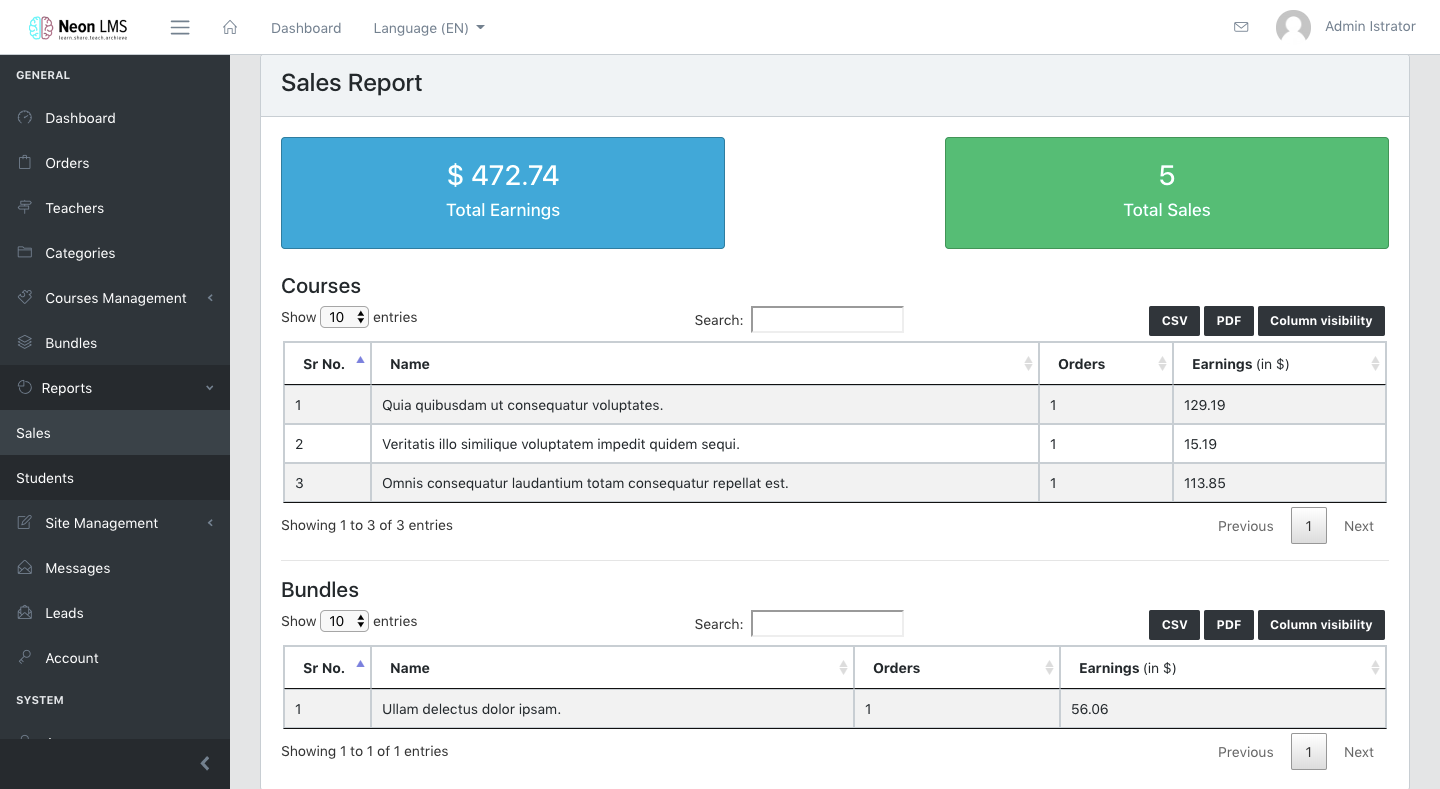
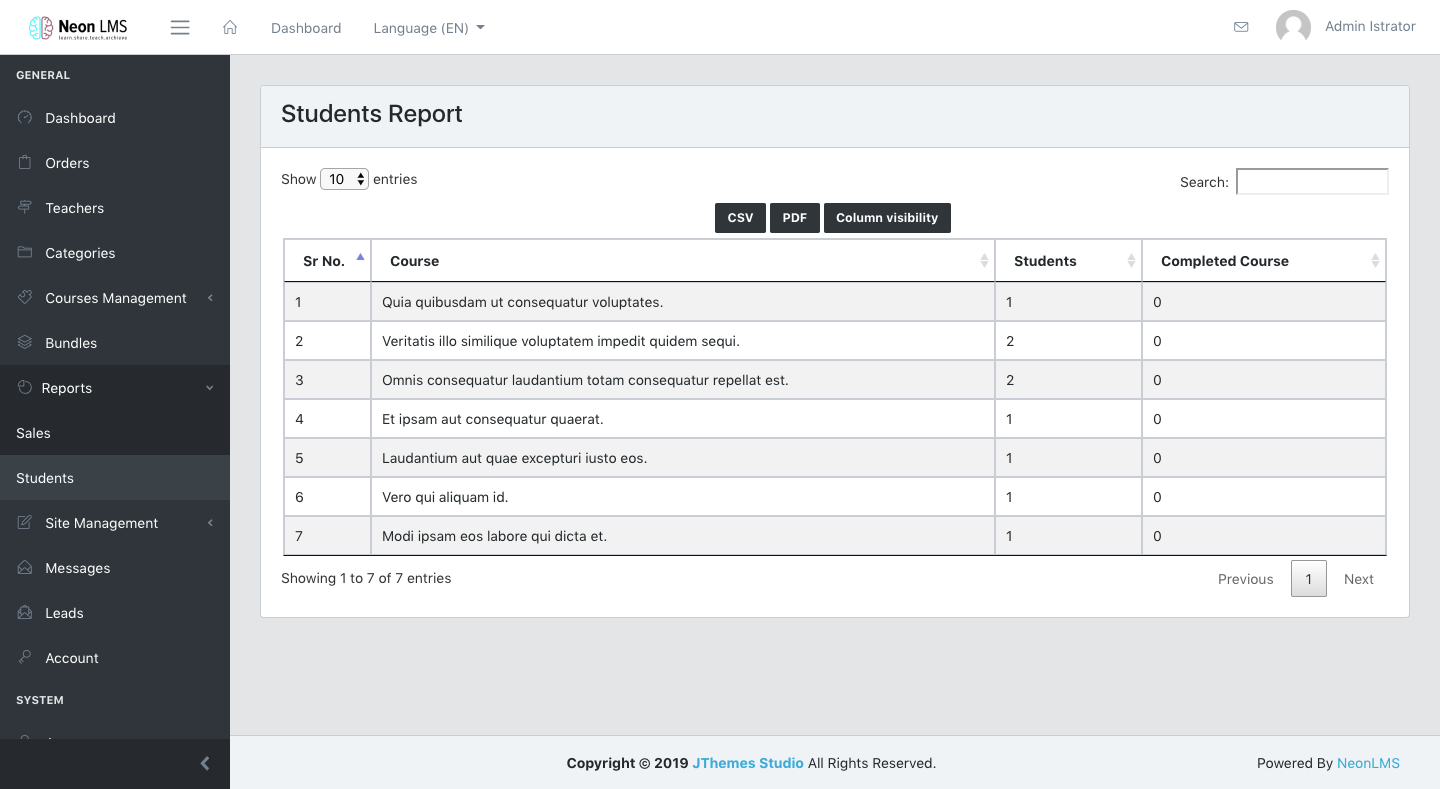
Students Report : Where you can find list of course in which how many students are enrolled and how many of them have completed the course
This is one of the most important menus. Your entire LMS can be customised from here. It has following submenus.
- Pages Manager
- Blog
- Reasons
- Menu Manager
- Hero Slider
- Sponsors
- Testimonials
- FAQs (Frequently Asked Questions)
- Contact
- Newsletter Configuration
- Footer
- Sitemap
1. Pages Manager
This is custom page creator for the theme. You can add, edit, update and delete
custom pages. It will be useful when you want to add some pages like: privacy
policy, terms and conditions etc.
You can also utilise this pages to display their link in navbar menu (Top Menu). You
will see list of all custom pages in Menu Manager
You can add Featured Image and enable/disable Sidebar. Besides this you
also get Published option. So if this checkbox is checked; then it will be
displayed in frontend or listed for menu. For making it SEO friendly we have added
special inputs for Meta Title, Meta Description, Meta
Keywords for the page.
2. Blog
This is additional feature you can use this theme for blogging as well. Create, edit, update, delete blog with this Blog Manager. Including rich text editor, Featured Image as well as custom Meta Tags inputs for SEO friendly blogging. You can utilise categories to categorize your blogs according to your blog niche. In frontend user will be able to share it and can add comments as well.
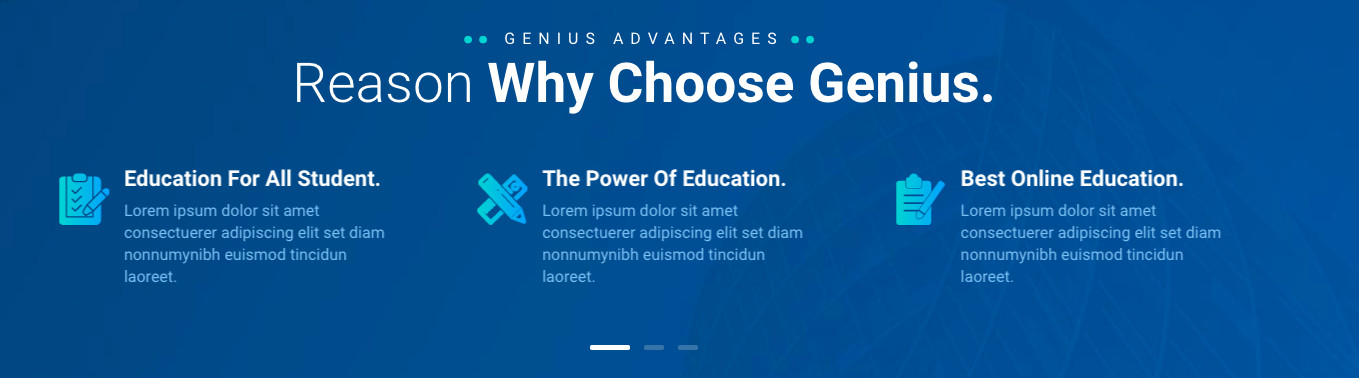
3. Reasons
This CRUD will be used to show as a slider in different layouts of Homepage. To create reason you will be required to add Title, icon and content. It will look like this in homepage :
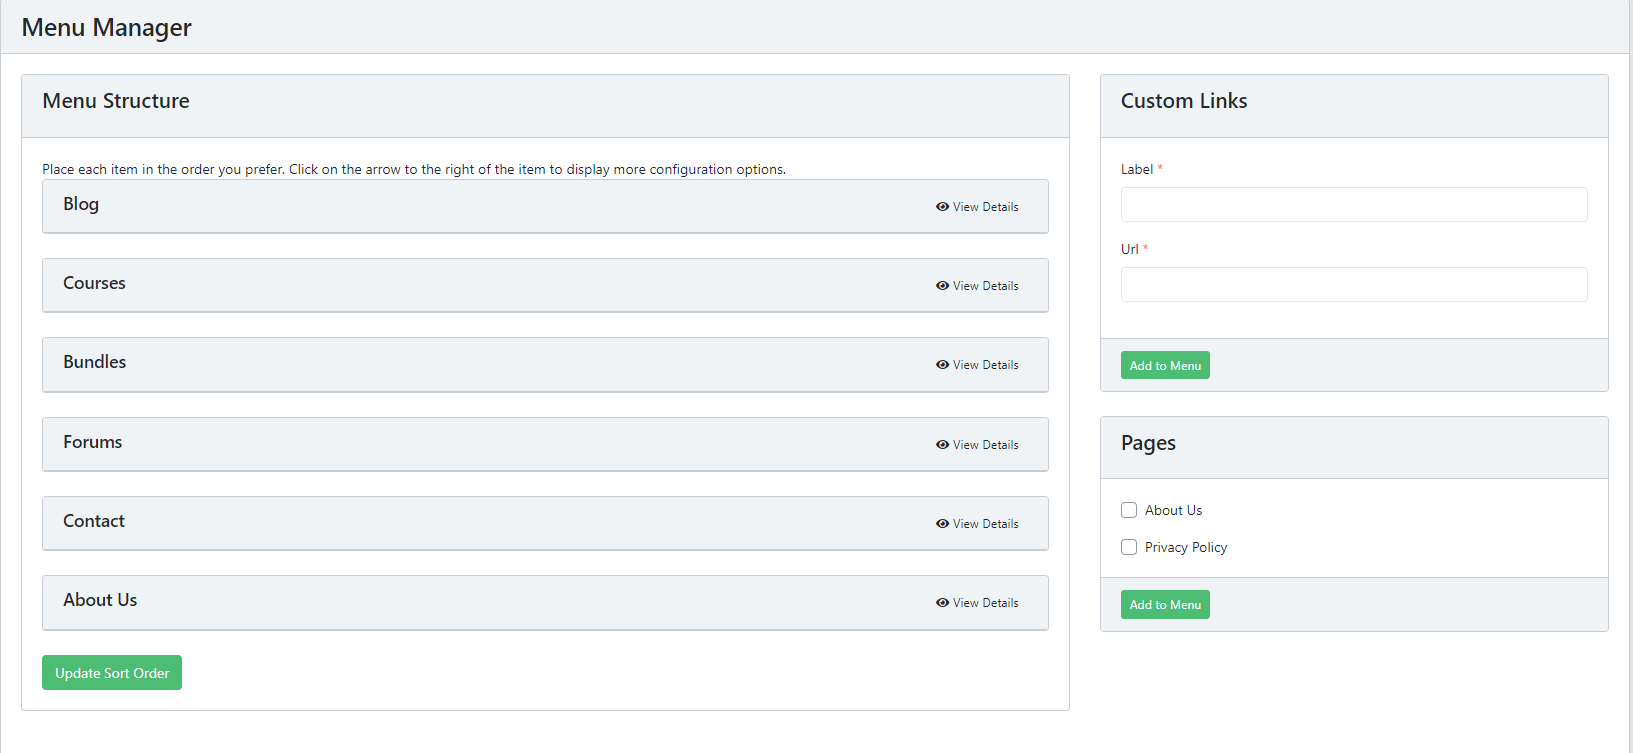
4. Menu Manager
Fully featured menu manager like wordpress. Add custom links and custom pages as
Menu. Create multiple menus and set it as Top Menu. Draggable menu structure for
sorting. Custom labels and links. We have added default nav-menu
with the theme. You can customise it according to your requirement.
Menu translation feature is also available. Once you add menu here in english. Go to Translation Manager and select Custom Menu group. Your added menus will be added in your default translation. Now you can add here menu translation for your system language. Once you've added all the translation click on Publish button.
5. Hero Slider
Customizable slider is one of the unique feature we provide for this theme. You can create, edit, update and delete as many slides as you want and add various widgets to it. You can add Buttons, Search box, Countdown timer etc.
Here is the picture of a slide from Homepage Slider

6. Sponsors
Dynamic sponsors list helps you to add custom sponsors to the theme list. All you will need is Name, Link of sponsor website or profile and a logo of the sponsor. You can create, edit, update, delete all sponsors. Here is how it is displayed on homepage.

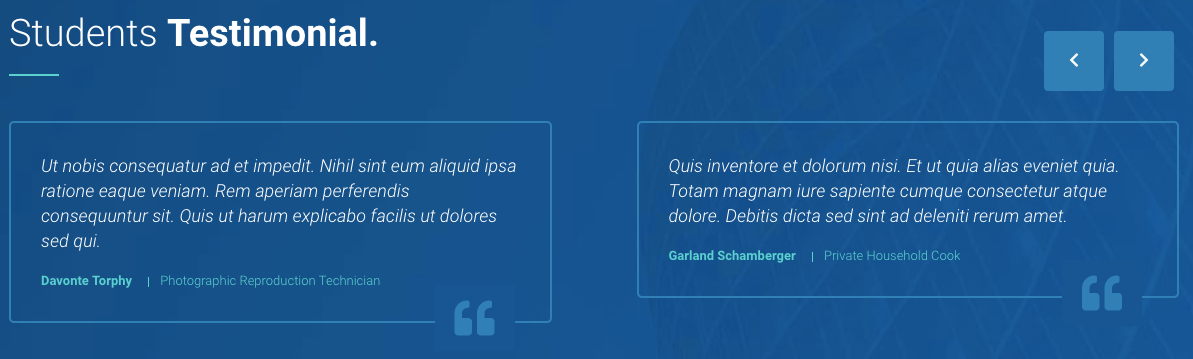
7. Testimonials
Dynamic CRUD to display on homepage. Testimonials are generally used to show customer review or message to public. It maybe about performance or services. So instead of choosing from other people you can write your own testimonials and it will be displayed in homepage. All you need to do is add name, occupation and content from backend. And there you Go!
As this is fully dynamic you can add,edit,delete as many as you want. Here is a picture how it will be displayed in homepage. (It may be different according to theme layout chosen from the backend)
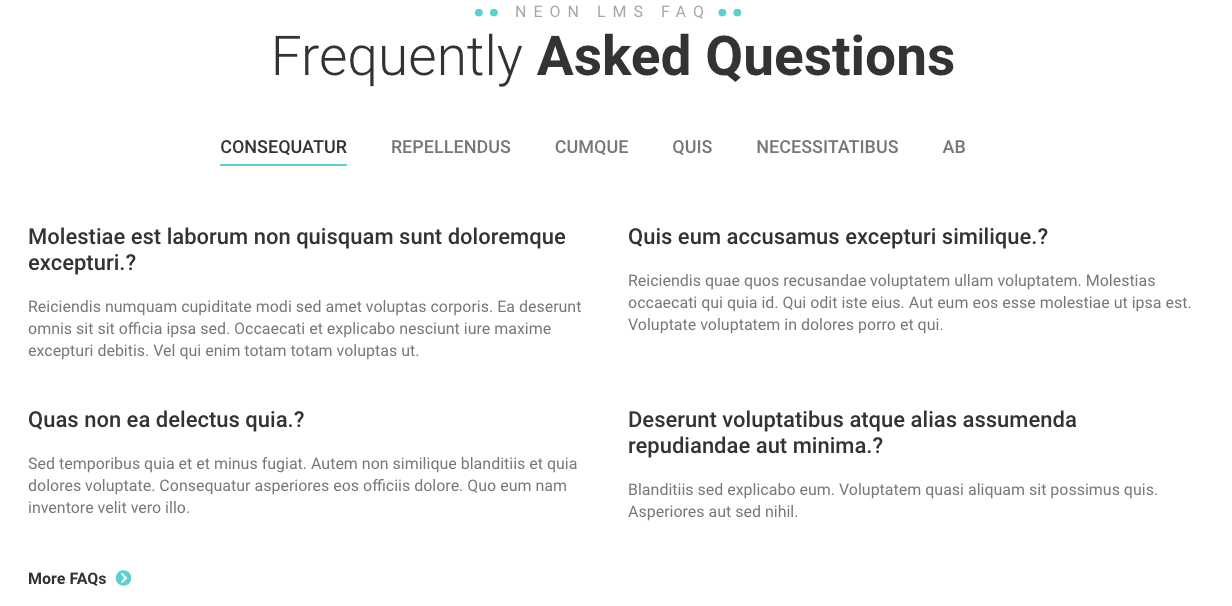
8. FAQs (Frequently Asked Questions)
This plays very important role for users when they have any doubts. It is your responsibility to sort out all the doubts of users. So you will need to prepare list of common doubts and present it as a FAQ. So other user can easily access it and clear their doubts faster. For that purpose we are presenting you dynamic CRUD for FAQs.
Yes, you can add as many questions and answers as you want and it will be displayed in a separate page. You can even categorize them, so that user can filter it out according to their requirement. You can create, edit, delete FAQ from backend and it will be displayed to frontend. All you need to create FAQ is to add category, question and answer. That's it! and now your FAQ will be displayed in FAQ page.
We also display recent added FAQ with category filter in Homepage according to layout. Here is a picture of a Homepage containing FAQ:
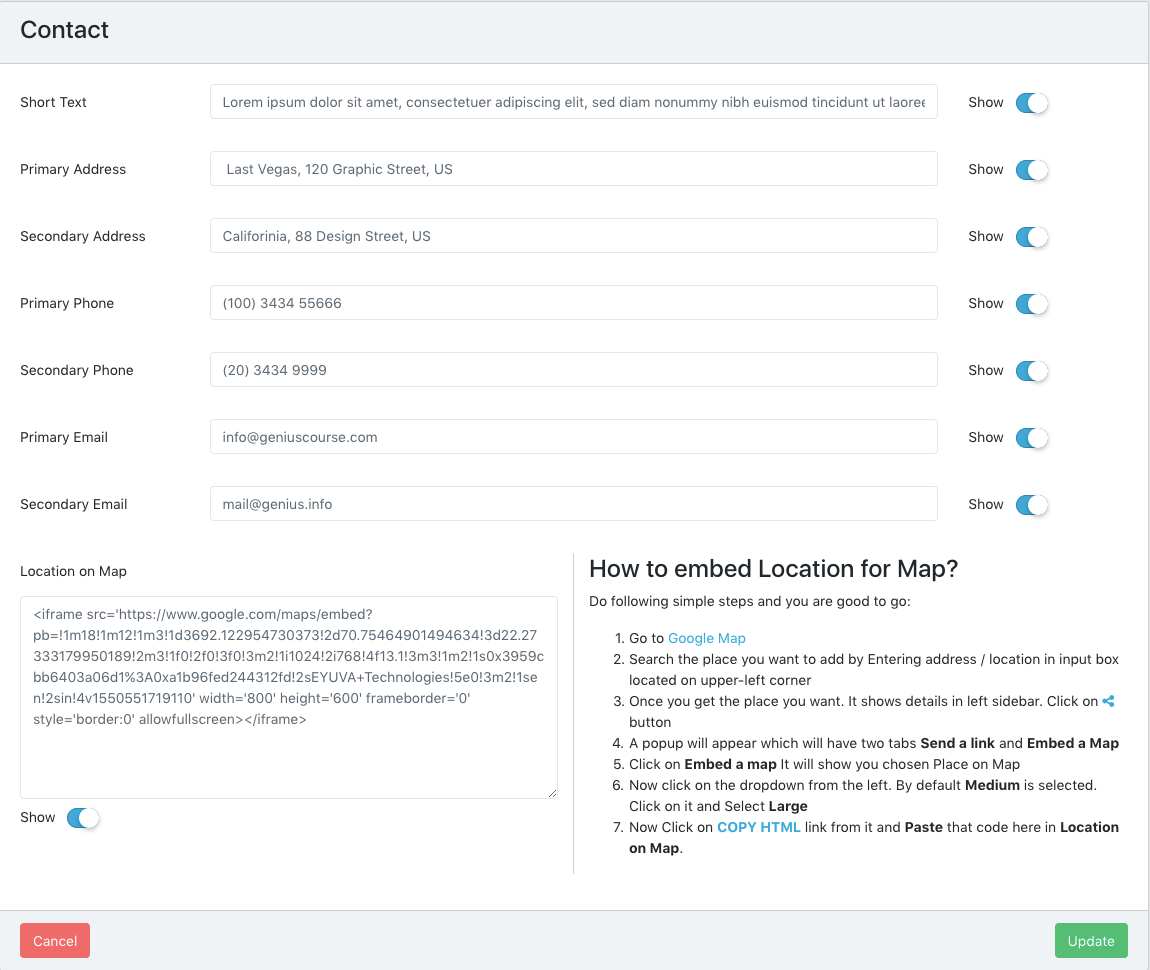
9. Contact
Here it is, one of the most advance feature of this LMS. With contact tab you can customise contact area of the theme which is displayed in a frontend
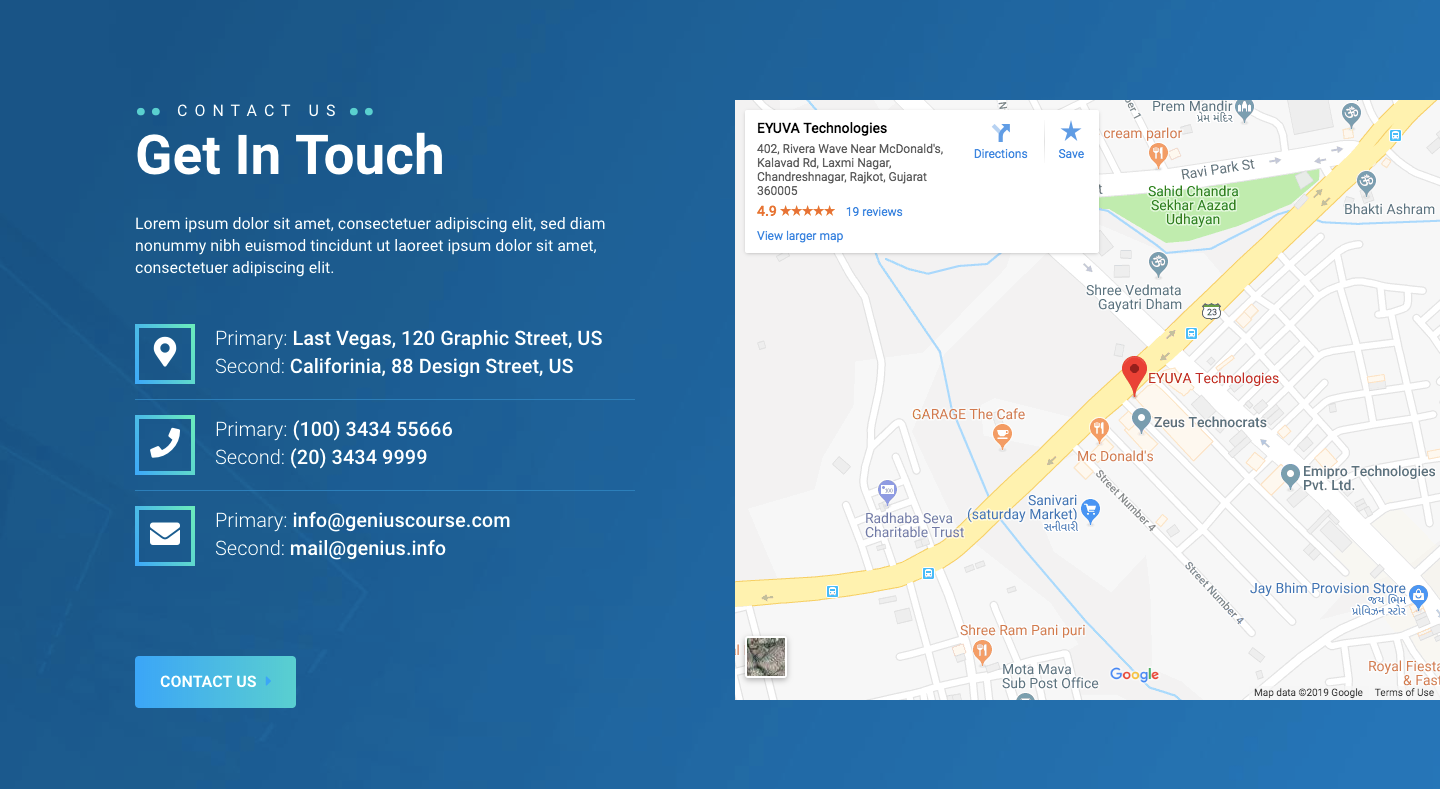
All the above details are customisable. You can embed your custom map with your address as per instructions given. You can also enable/disable all the components like short description, primary secondary numbers, address, map etc.
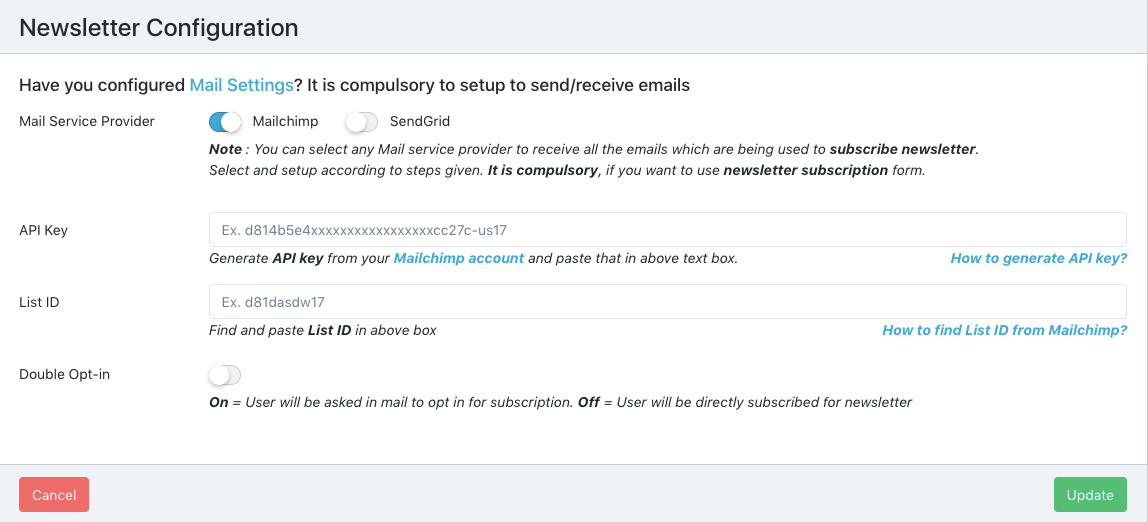
10. Newsletter Configuration
Lead generation is importance for any sort of website. You can configure Sendgrid or Mailchimp whichever is convenient to you.
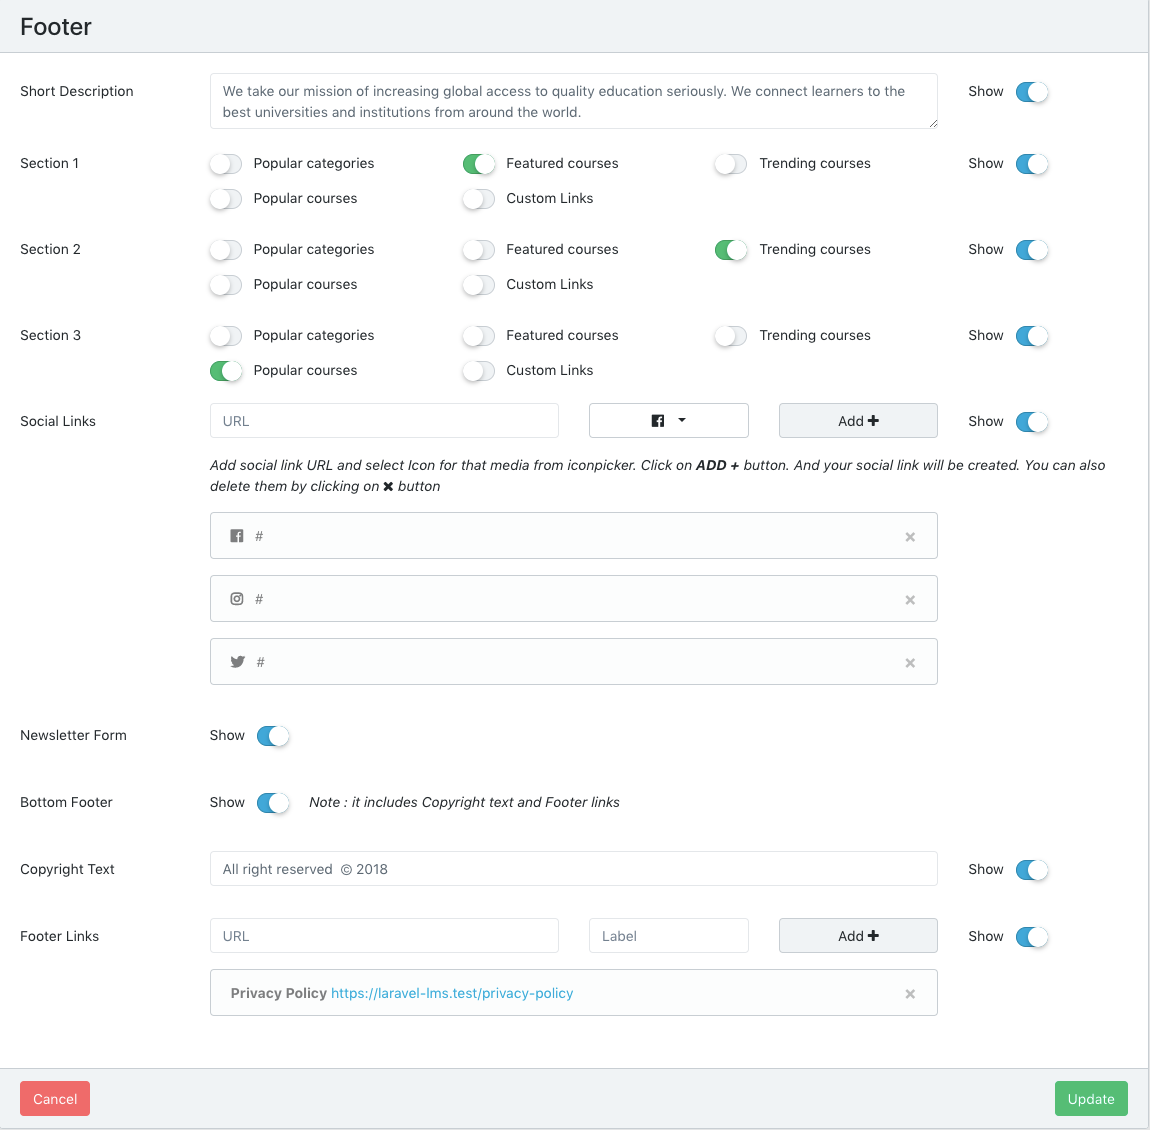
11. Footer
You can dynamically use footer in the frontend of the website. You can add description, custom links, newsletter form and so on.
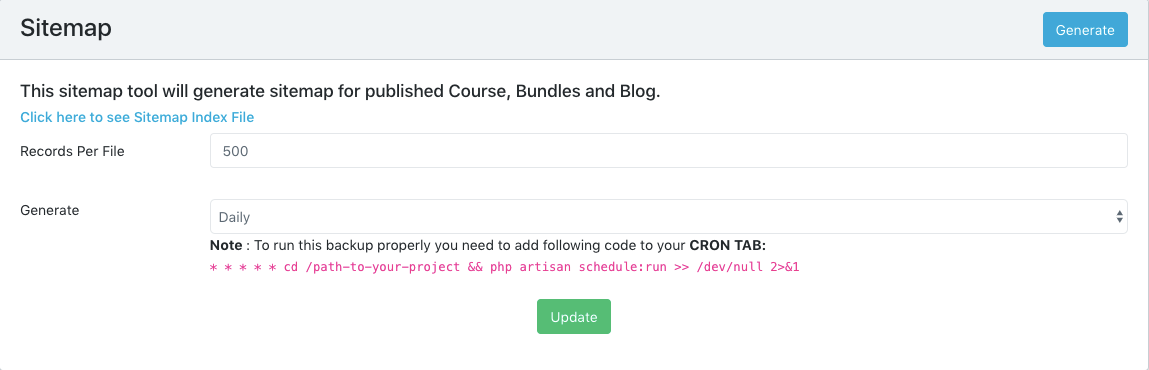
12. Sitemap
You can generate sitemap for blog, bundles and courses. It is good for SEO purpose. You can auto generate sitemap if you follow guidelines. And you can also specify number of records per sitemap file
This tab is located in dashboard. It is provided to make Teacher and Student communication more easy and powerful. From dashboard student can search and send message to teacher. Where as teacher is allowed to replay them or can contact other teachers.

This tab is basically for Administraor only. Here can get list of all the users who tried to contact via contact form of the website. Details to be received via contact form are as follows:
- Name
- Phone
- Message
- Time (the time when request was received)
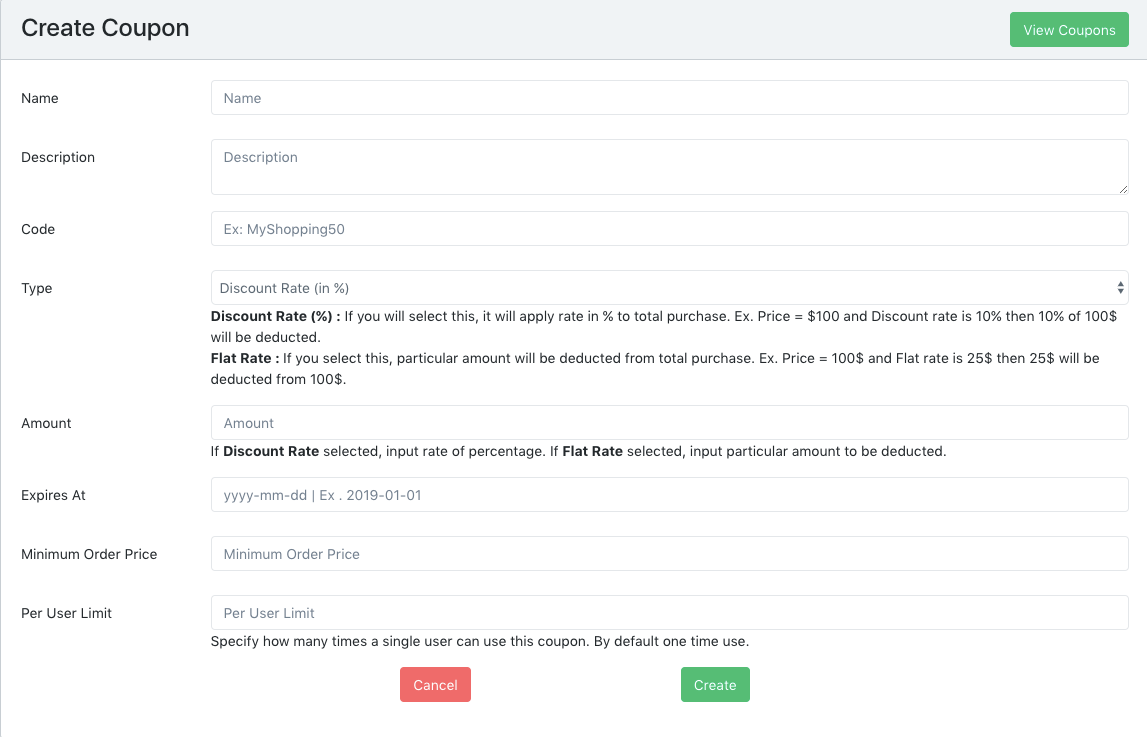
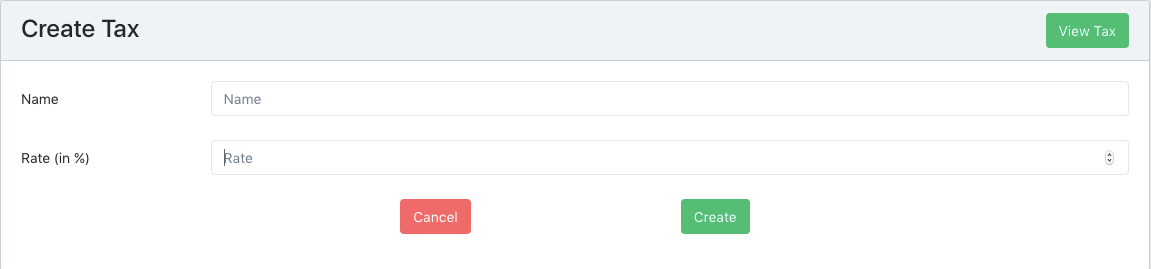
Creating coupons is very easy in this script. Coupon code should be unique. You have to enable status from coupons list page after creating coupon
Multiple tax can be added. It will be applied to subtotal.
List of all the payment requests by the teachers from the amount earned as a commission from courses / bundles sold will be displayed in this menu. Admin can approve / reject the requests.
Teacher Dashboard will have Payments menu, from where they will be able to send requests to admin user. Teachers can also check statistics of commission earned and requested balance in that menu.
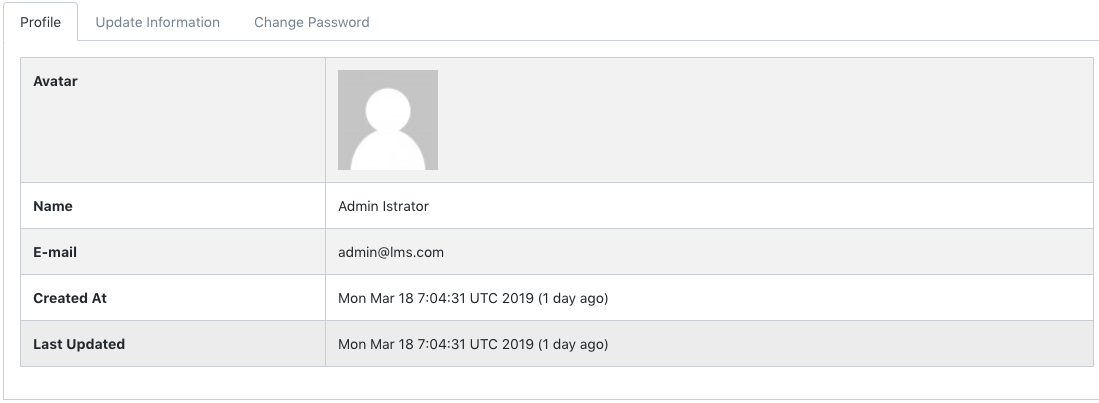
This tab is given to user of every role. Here user can manager his personal details and make changes to their profile.
Here you can create, manage users and their roles. And you can also assign
permissions to roles.
It has two submenus: User Management and Role
Management
User Management
You can create, edit, update and delete users and can also assign them particular roles. Besides this you can also give them permission listed in the right sidebar.
Role Management
Here you can create, edit, updated and delete different roles and associate various permissions with it. It necessary to assign permissions according to role. So that user with particular role have access to that particular portion only and don't mess with other things.
This is basically divided into two parts: General Settings and Social Login
General Settings
It consists of five different tabs containing important user interface settings as well as mail and payment configurations settings. General, Logos, Layout, Mail Configuration, Payment Configuration. Let's understand this one by one.
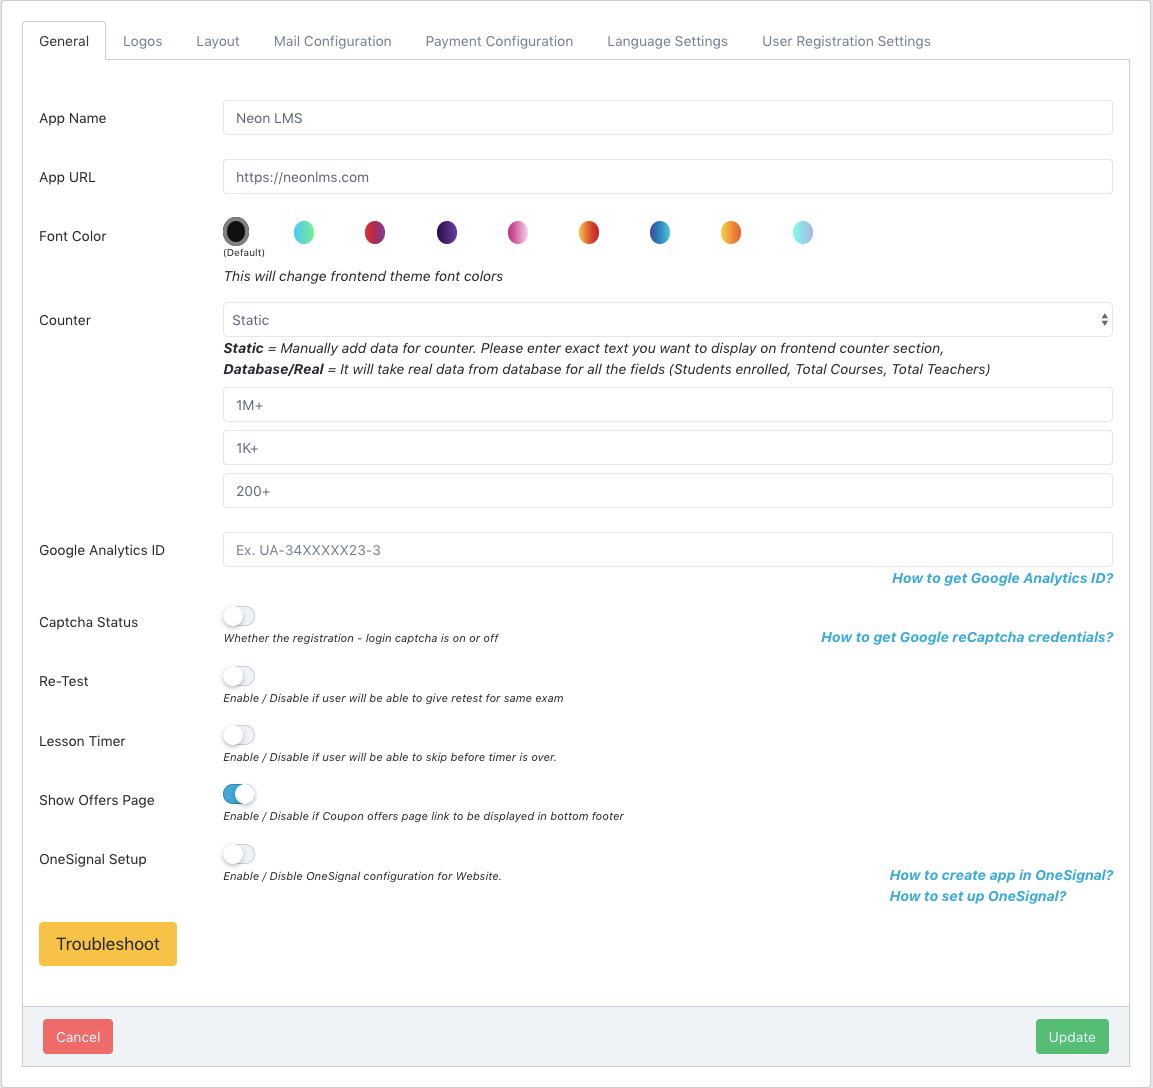
App Name is used in official email communication and in various components of theme.
Font color will directly affect the entire theme components and fonts, It will apply selected combination to entire theme and change the look of theme.
Counter will be displayed in HomePage layout. You can either use static data or the real data from database according to your choice

Google Analytics ID helps you keep tracking of your website traffic via Google. Here is How to create Google Analytics ID?
Captcha Status will allow you to avoid spamming in login as well as registration
Retest feature will enable - disable retest functionality in Tests
Lesson Timer will be displayed before clicking on Next Lesson.
Show Offers Page will display link of offer page in bottom footer. The offer page will contain list of Coupons
OneSignal Setup will be used to configure push notification in this script.
- Create App in OneSignal.
- Generate Code and paste it here.
- Uploaded OneSignal Files in public folder of the script.
- Allow notification to test.
TroubleShoot button will clear all the cache of the script and will refresh storage symblic link in public folder.
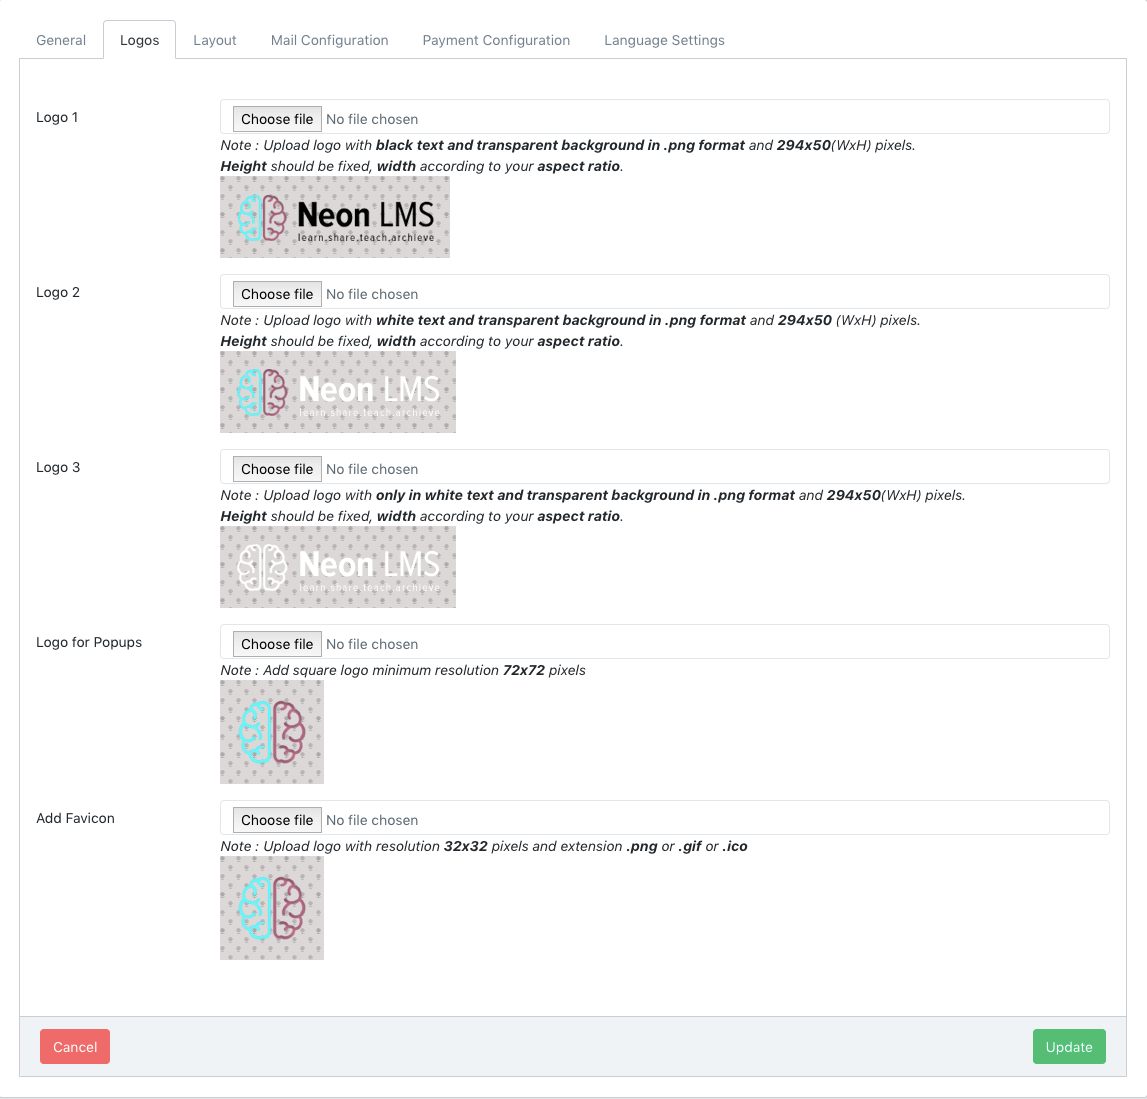
If you want to upload yout custom logo then please follow the instruction given below each logo. For better results in all the layouts please upload all three type of logos as given in snapshot. Populogo will be used in many places like login popup and dashboard. Favicon will be used to display in web browser as your symbol.
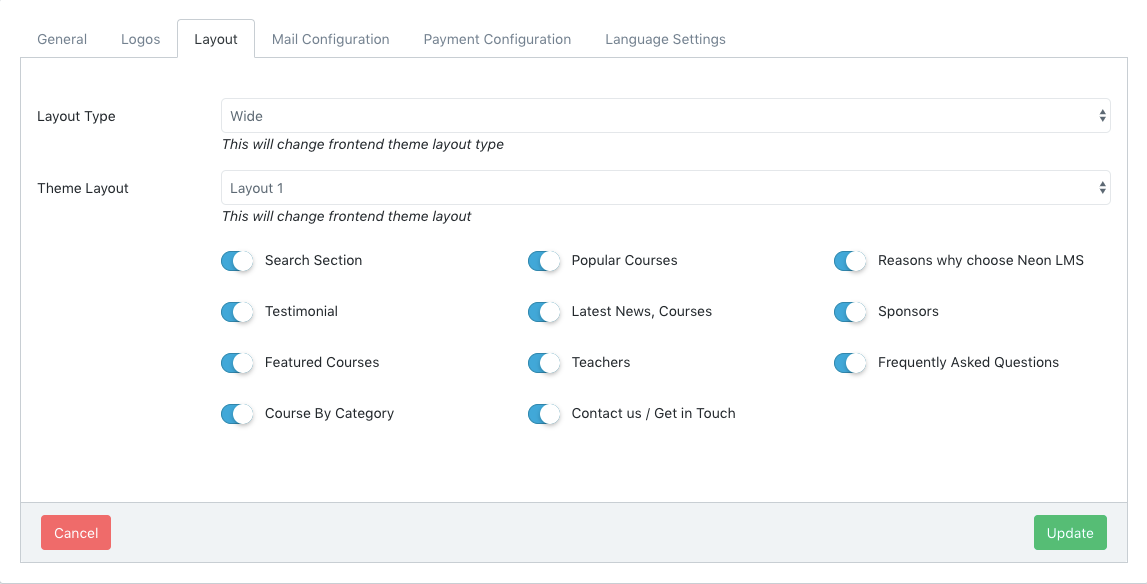
This is one of the best feature brought to you buy this theme. You can select from 4 different layouts and control visibility of the sections are available in that layout. You can select layout type as box or wide.
This will be used to make email communication working. Because without Mail Configuration you will not be able to send or receive email regarding this. Example : Forget Password Emails, Leads Emails etc.
You can use any Mail service provider you want. As it is a Laravel Application configure and search it according to Laravel setup
We are presenting you dynamic payment methods for your website. And you can also select currencies from the list in which you will be able to deal the purchases. You can enable/disable payment methods you want to show while user checkout after adding item to the cart. The only payment methods enabled in dashboard will be displayed while user checks out.
STRIPE Payment will directly use credit - debit card for payment. Here is how you will get STRIP API Credentials Click Here
PayPal Payment will redirect to PayPal checkout where user can login with their paypal account and make payment. Here is how you will get PayPal API Credentials Click Here
Offline Payment will send order email to the admin and he can handle the order
by making personally contact with buyer. Once transaction is completed admin can
complete order by visiting Dashboard -> Orders , find that order and
click on Complete Manually button. Now that course will be displayed in user
dashboard and invoice will be generated for the user for that order.
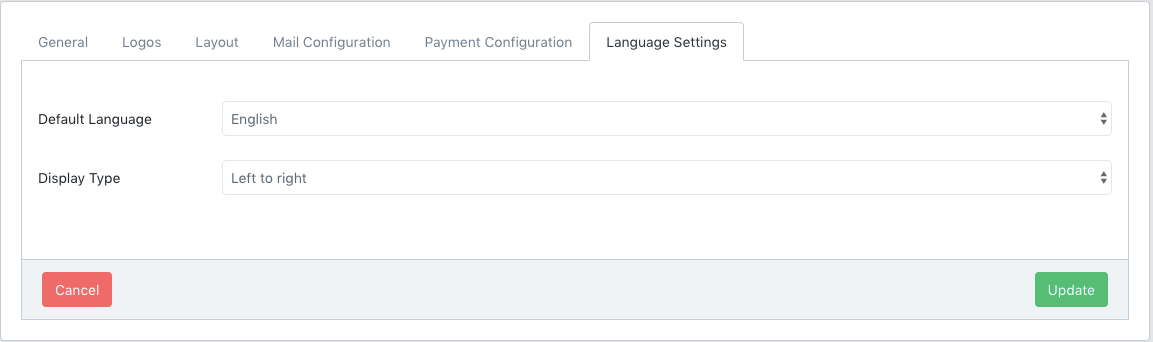
We are supporting multiple languages for users. Here you can select defaul language for the website and layout for the same. There are two options available for layout: Left to Right and Right to Left. First one is regular layout which we see in normal website, But the Right to Left layout is used with particular languages like Arabic, Urdu etc. There are currently four languages available in Neon LMS : English, Spanish, French and Arabic.
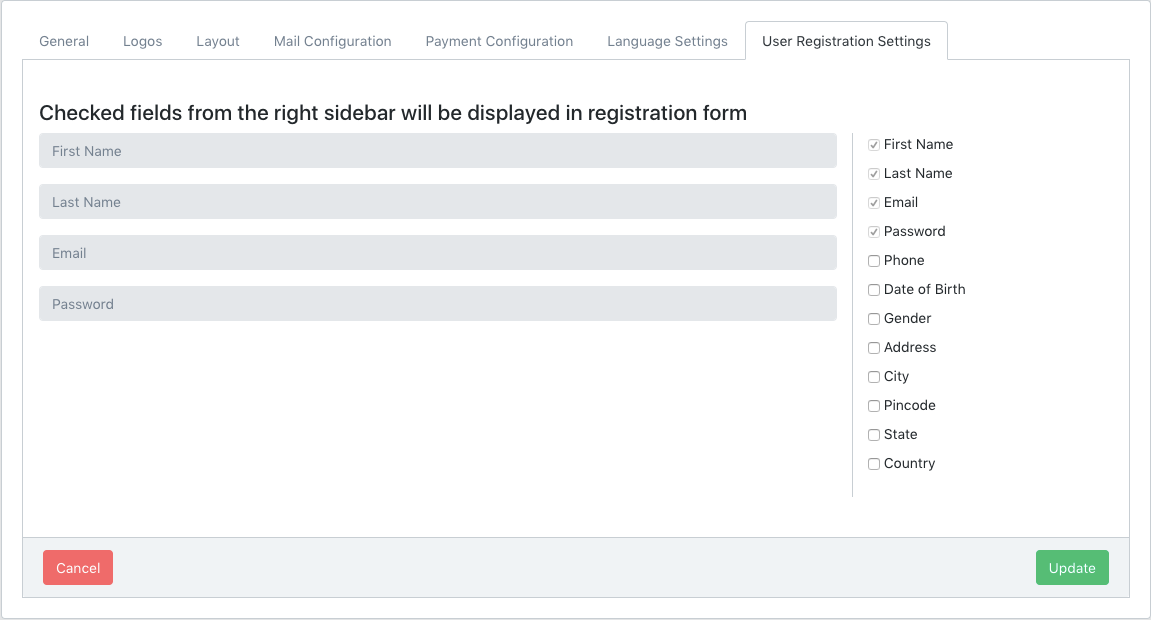
User Registration Settings
Here you can specify fields to display which will be added in registration form when user signs up. You can ask for specific details from the user from listed in right panel.
API Clients
Generate and Revoke API Client ID and Client Secret. You can use them to create android apps or Testing API.
Developer Manual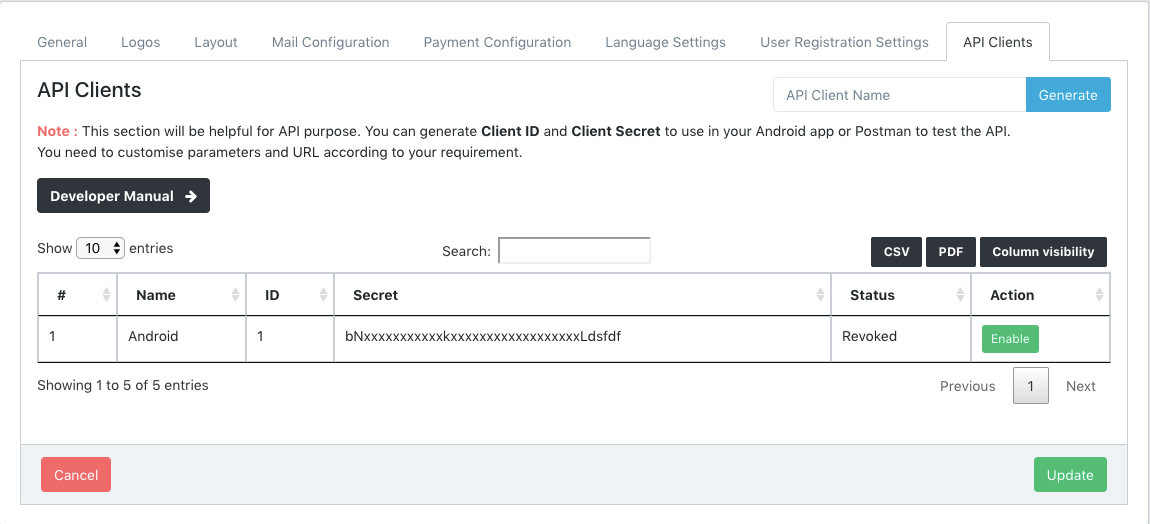
Social Login
We are providing you three most trending social login feature including Facebook, Google and Twitter. Only enabled social login provider will be displayed in login popup. To configure social login, you need to add Api credentials for respective social login provider.
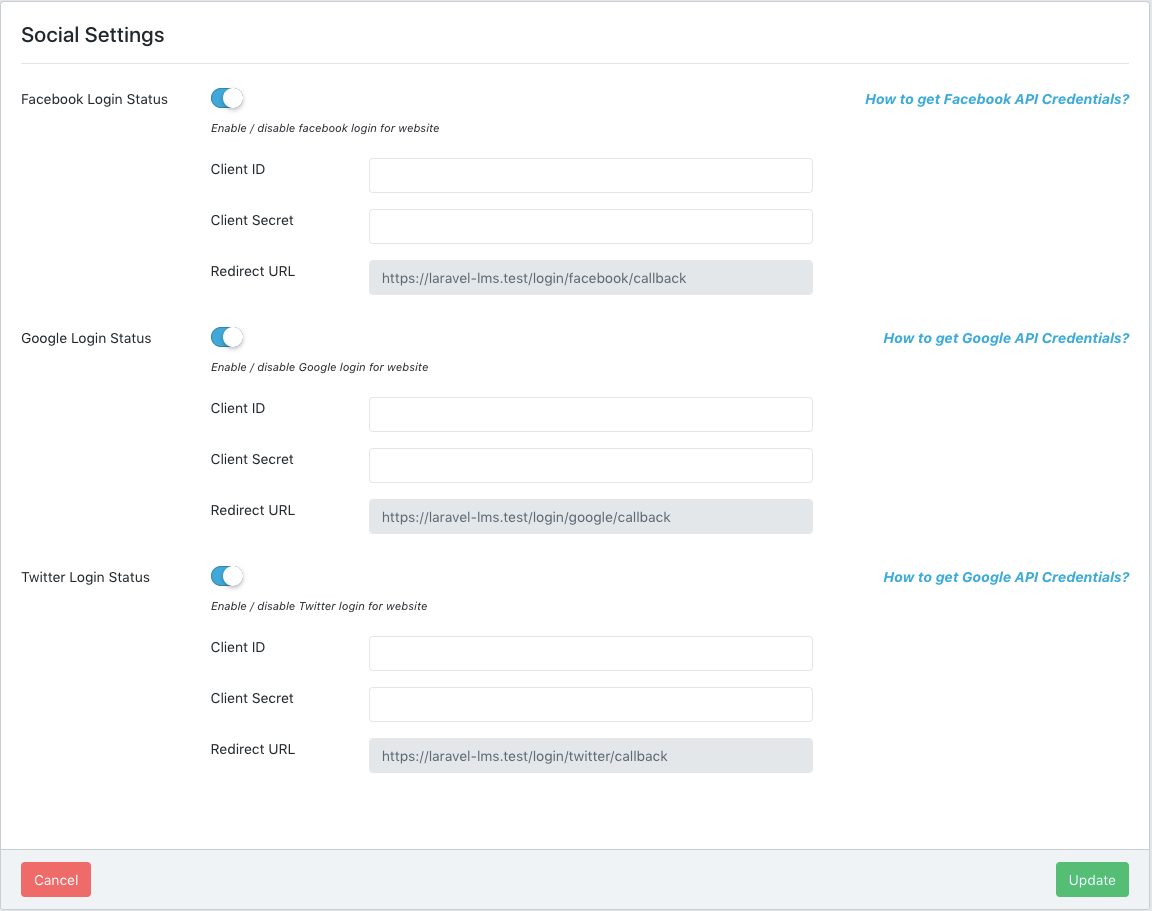
So, now we will tell you how to obtain and configure for each social media API credentials.
Facebook Social Login
- Visit https://developers.facebook.com/apps and Login to your Facebook Account
- Now click on Add a New App. A popup will appear.
- Add app Display Name and Contact Email. Then click on Create App ID button to create your app
- You will be redirected to you app page once you app is created. Now click on
 which is located on left sidebar.
- Find Facebook Login from listed product and click on Set Up button once you find it.
- Now you will see Facebook Login is added under . Now open that dropdown and click on Settings
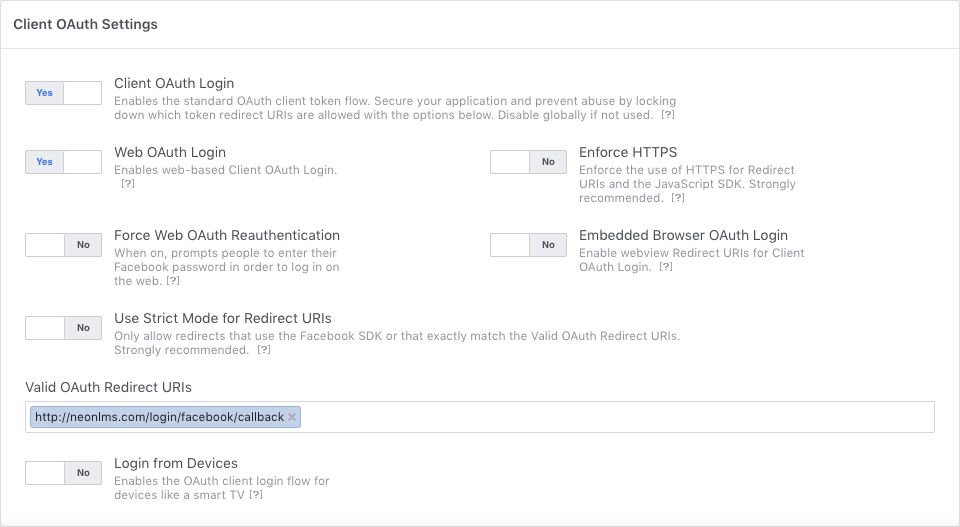
- Scroll to Client OAuth Settings. Copy Redirect URL of
Facebook from your Social Settings of theme and add this to Valid
OAuth Redirect URIs in facebook app page. And click on Save
Changes. It may look like this:
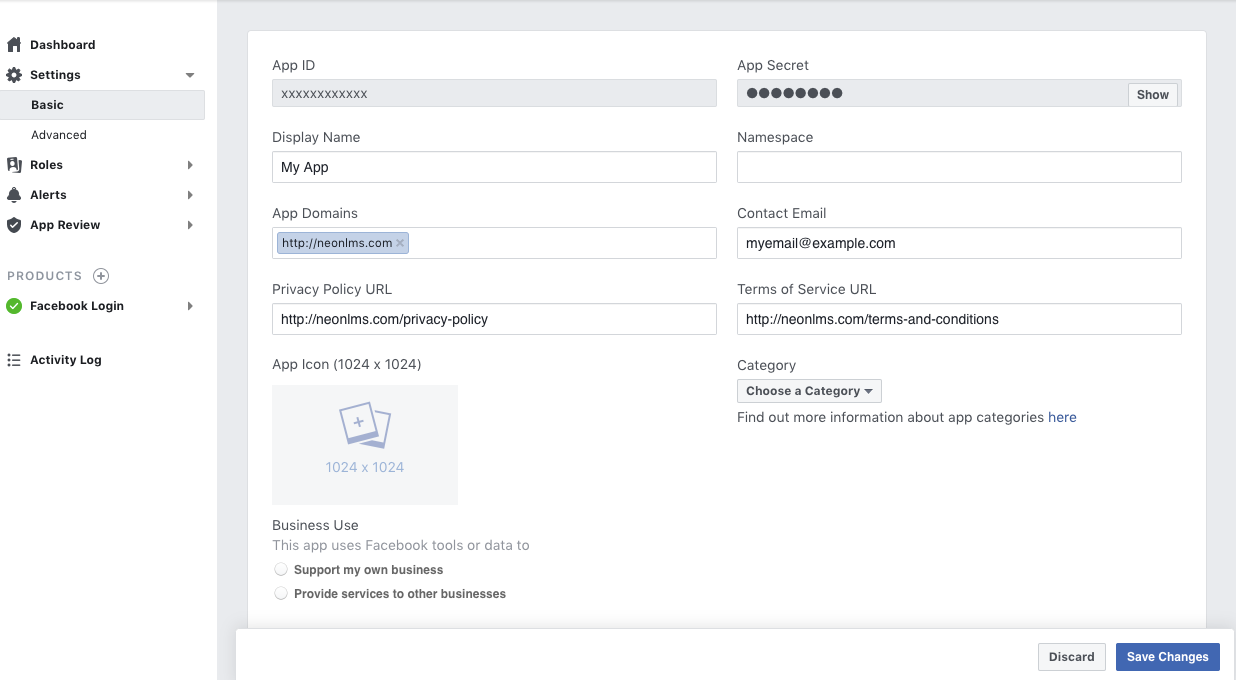
- Now form left sidebar go to
Settings -> Basic. Your screen will look like this. Fill following details and click on Save Changes- Display Name : Enter you App name
- App Domains : Your App URL
- Contact Email : Your Contact Email ID
- Privacy Policy URL : Your website's Privacy policy page URL
- Terms of Service URL : Your website's Terms of Service page URL
- APP Icon (if required): You website logo.
Now click on Save Changes button and you are good to go.
Copy APP ID and paste it to Client ID. Copy App Secret and paste it to Client Secret in
Social Login settingsNOTE: Facebook login will work on HTTPS only.
Google Social Login
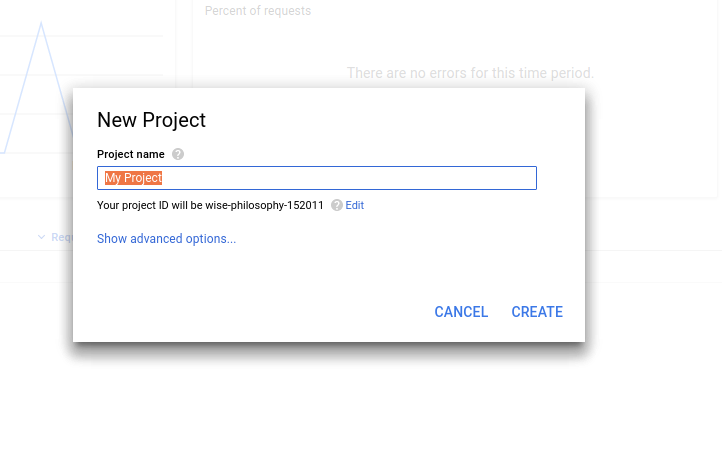
- First, you need to create a new project at https://console.developers.google.com
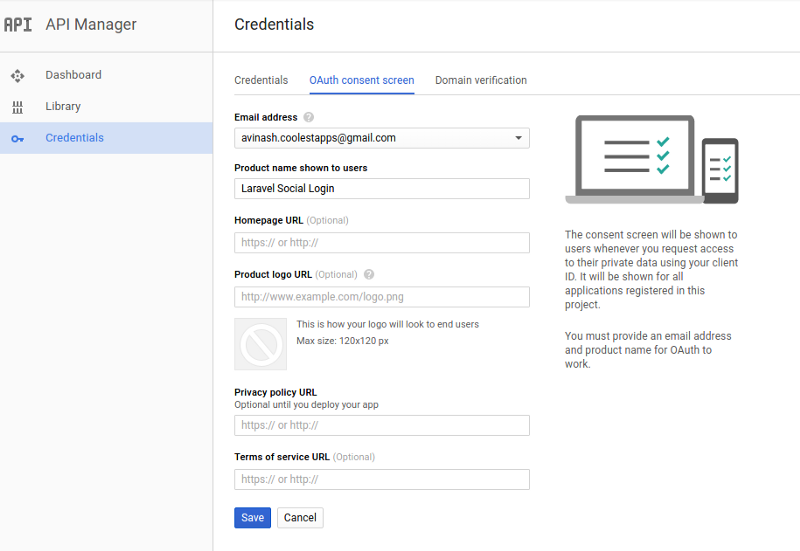
- After creating your app successfully, Click credentials in left side navigation
and select 'OAuth Consent Screen' , fill out the details there.
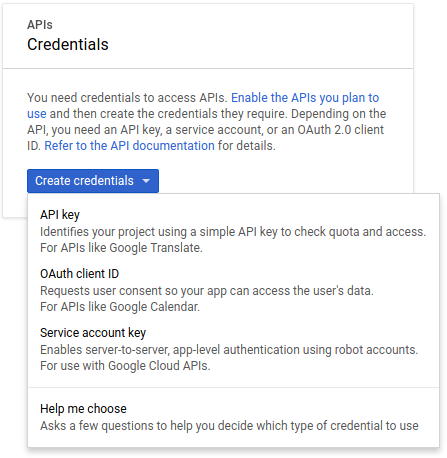
- Now you need create credentials for your app. Click credentials in left side
navigation and select 'Credentials'. In the dropdown select 'OAuth client ID'
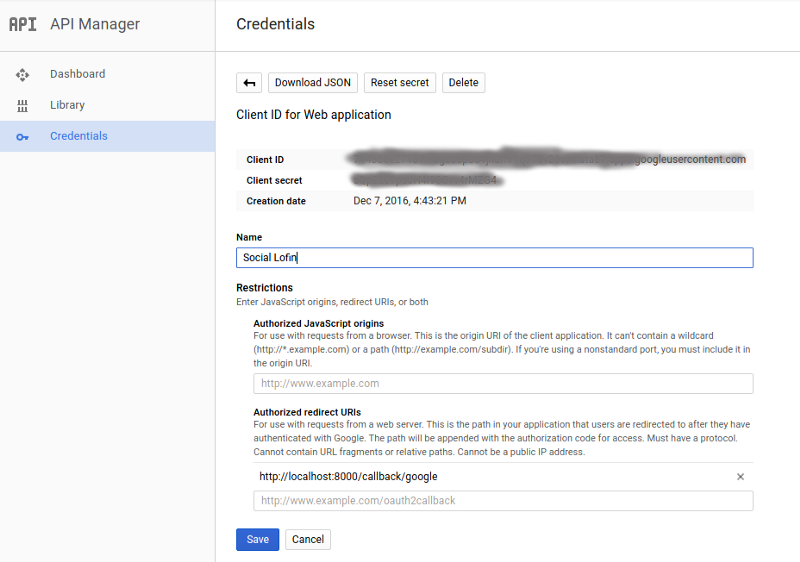
- In the OAuth client ID screen, select the type of application, give origin and callback URLs, Copy Redirect URL from your website and paste to Authorized redirect URIS in OAuth Client ID screen. Now click on create.
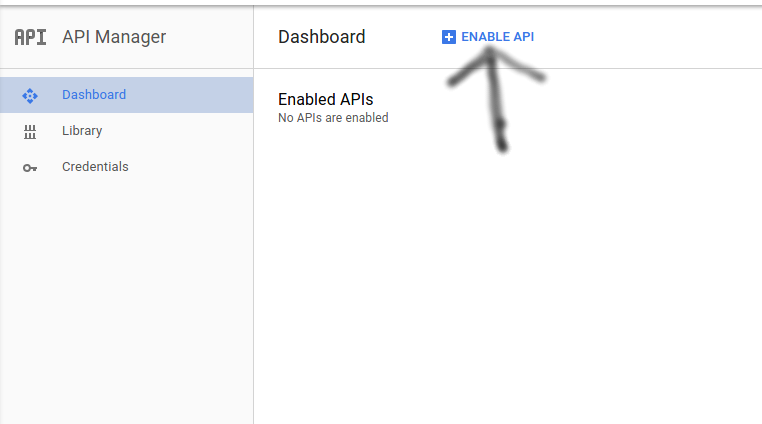
- You also need to enable Google + Api too. You will see a 'ENABLE API' button,
click it.
- Select Google + in Social API's.
- Now you will get the Client ID and Client secret in the credentials page.
- Now add these credentials to you website.
Twitter Social Login
- Register a new app at https://apps.twitter.com
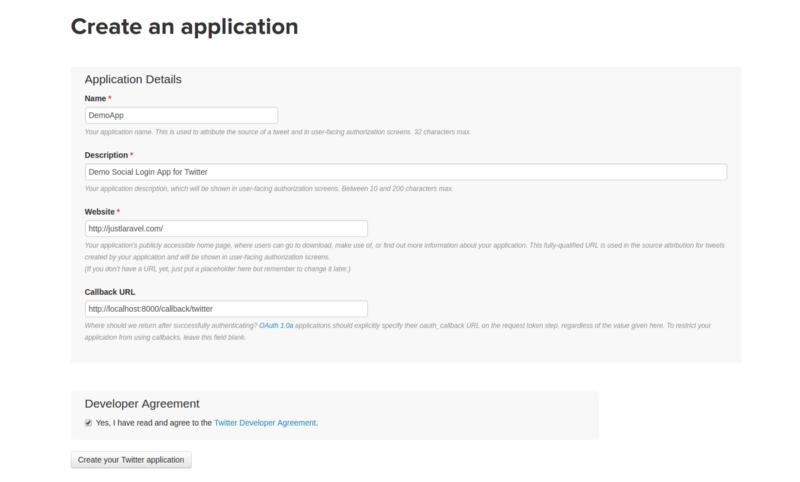
After creating your app, click 'Keys and Access Tokens' tab at the top to get Client ID(App ID) and Client Secret(App Secret). Add this credentials to the website and you are good to go.

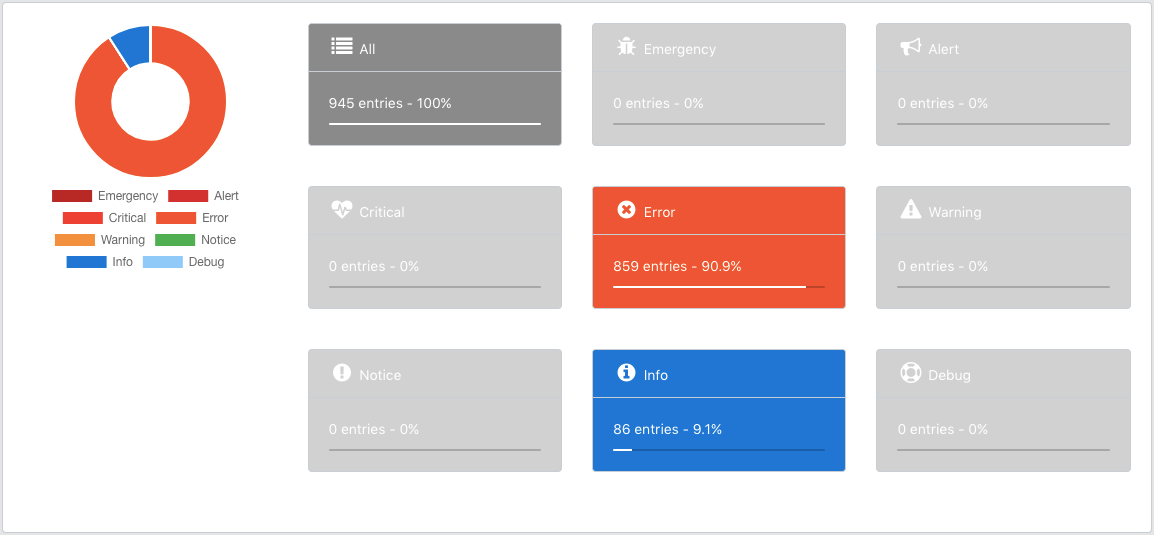
This is site debugger tool. Where you can watch out current condition of your website. Like errors, warning alerts and all. Besides this you can also check and download errors logs. And can also view it in details.
It helps you in managing locales of the website. Here you can see list off all the languages file. You can edit, update and delete them. You can also create new locale. Means you can add new language. We are giving by default three locales with theme; English, Spanish and French. You can also update those files if you think this is not a right translation.
If you click on Choose groups and it does not show any option. Then click on Import Groups button. By that all the locale files will be added to the website and you will see list of files in choose group. If you select a group from the list, you will be redirected to view/edit page
If you want to update any of the language translation, just click on it and an editor will be opened. Edit it and click on save. Now If you want to publish this change then click on Publish Translations from above area and your translation would be applied to your live site.
For data security Backup plays important role. Suppose if there is any consequences in your website and you lose your data, then this backup will help you. We have added DropBox backup feature. All you need to do is follow simple steps; your backup will be automatically taken according to your choice and will be saved in your dropbox account.
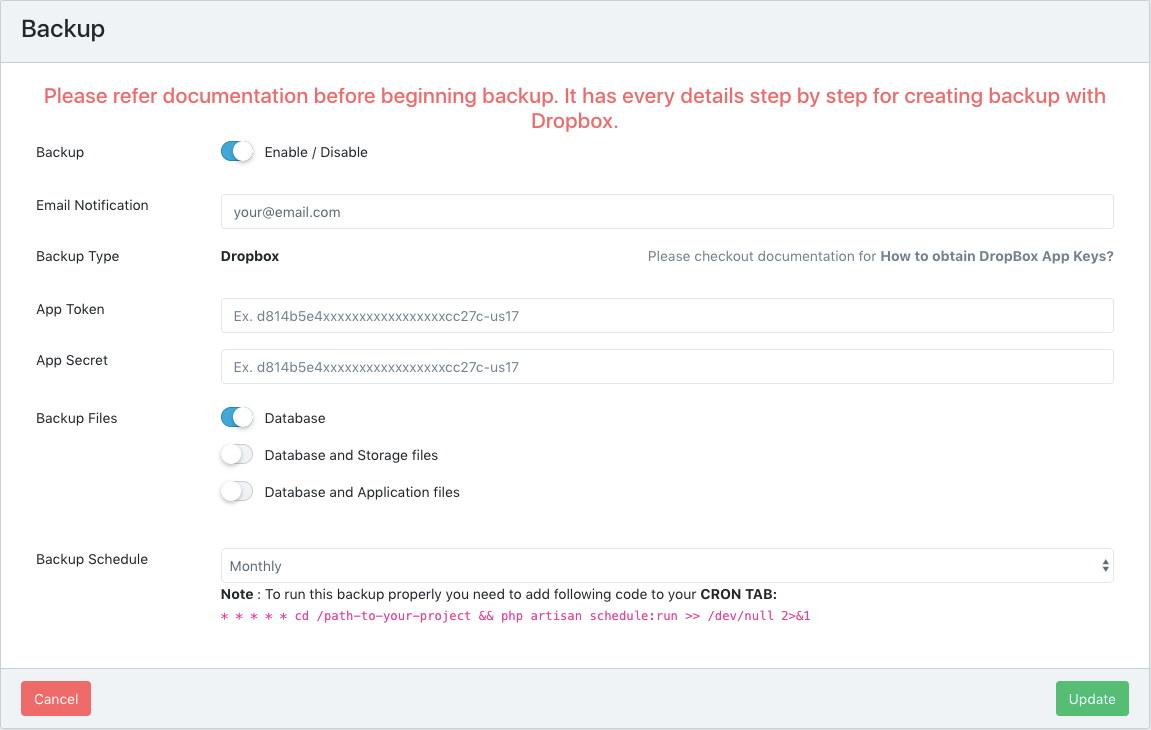
You can schedule backup in daily,weekly and monthly basis. Besides this you can also specify that what do you want to backup. Like, only database, database - storage files (it includes all the images data of users) and database - application files (entire website data)
You will be notified every time on your email when your backup is generated and saved. You need to add your email id here to receive backup notification. You can also Enable / Disable backup as if you want to backup your application or not.
Here are the steps you need to follow in order to obtain App Token and App Secret from DropBox to backup your application.
Create a Dropbox API App
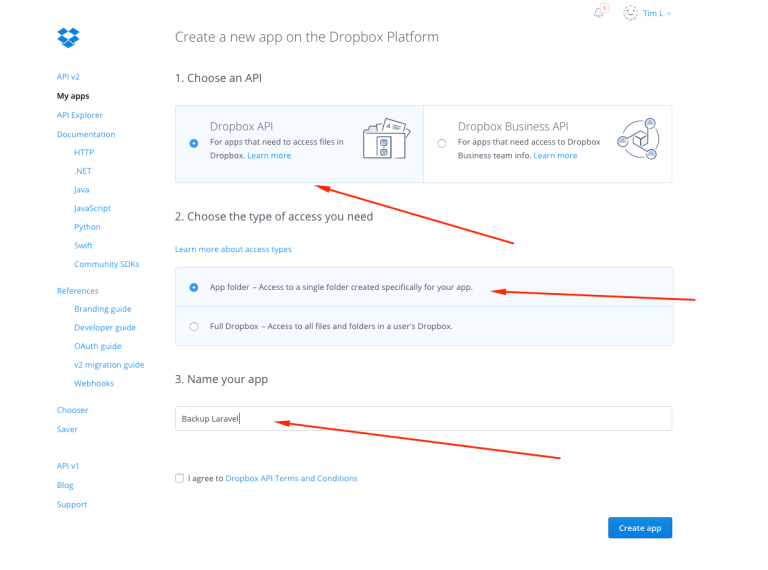
- Make sure you generate an access token. Save the access token and secret add this token in your application. Generating an access token will create a folder Apps in your Dropbox folder. This is where your backups will be saved.
This feature is very precious but before using it make sure you've already backup your application. So that your data stay secure. Because when an update is applied, all your custom changes in application files will be lost and your current application files will be replaced with new files.
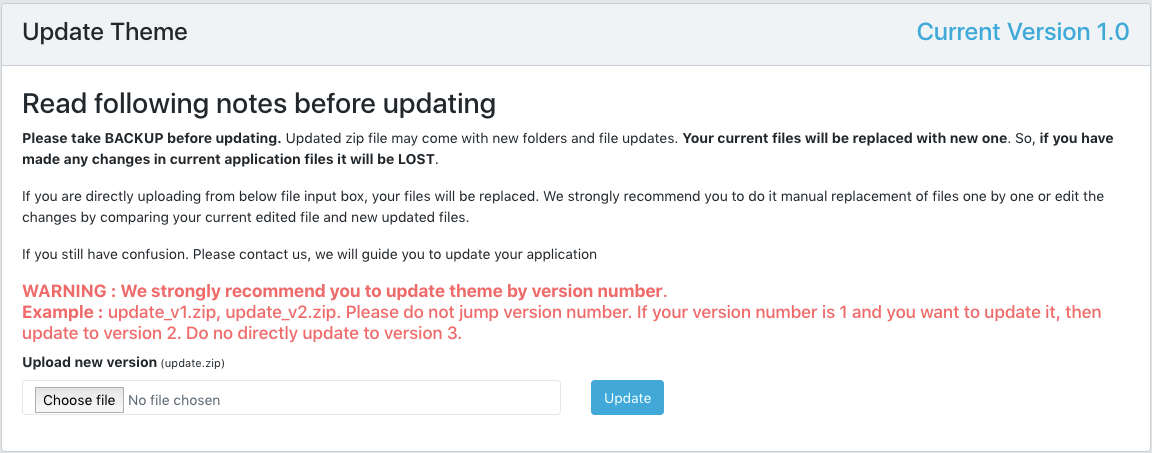
If you have made changes in application files and want to update theme, then unzip update.zip in your local and compare files, update or make changes in your files one by one. So that you can have your custom files as well as new update changes.
We strongly recommend you to update theme by version number. Example : update_v1.zip, update_v2.zip. Please do not jump version number. If your version number is 1 and you want to update it, then update to version 2. Do not directly update to version 3.
- Bootstrap
- Jquery
- Font-Awesome
- Sweet-Alert
- Full Calendar
- Bootstrap-timepicker
- Bootstrap Colorpicker
- Select2
- Datatables
- Morris
- Sparkline
- Gmaps
- Bootstrap select
- Bootstrap tables
- Laravel Framework
- Laravel Activity Log
- Laravel Permissions
- Log Viewer
- Socialite
- Translation Manager
- Invoice Generator
- Laravel Cart
- Chatter Forums
- Gerardojbaez messenger
- Laravel Newsletter